Pages

Showing posts with label Worms. Show all posts

Tuesday, April 1, 2014

Weeds n Seeds n Worms - roughhouse composting

A couple of posts ago I talked about the compost bin, mowing and weeding, and so the question asked is 'where do the weeds go?' Do I burn them? Thrown the out in the trash?

Nope, I throw them all in the compost bin.  Reading around I see there are folks that are really 'light handed' (for want of a better term) with composting and in particular worm composting. In normal compost they have ratios and don't put things in for want of damaging their end product - and I can see the sense in that... to a degree. For instance I wouldn't put pesticides in there or chemicals, nor would I put meat scraps in because of smell and flies.  But other than that it's all good. Probably the only thing out of the ordinary I won't include, and throw out in the trash, is tomato plants - there's enough empirical evidence for my liking to back up not wanting to pass on tomato based problems into the tub. I haven't personally proven or disproven it, but enough people who's opinions I respect treat it as 'common knowledge'.

Now, what you get out depends on what you put in - and making compost is in some ways like brewing beer.  I understand people wanting a specific 'fast brew' compost for the sole purpose of fast garden use. If you're one of those people, have at it - nothing wrong with this at all.  But if you want a multifunction compost solution, you can afford to be a bit rougher, and still have good results.

The reasoning of 'no weeds in the compost' sorta makes sense. That seeds might come out the other end of the process and go straight into your garden, planted, and make more work. But really lets look at it objectively:

I have a 4 x 4 frame for composting, it's constantly breaking down, and I'm constantly adding paper, grass, leaves, veg scraps, cardboard sheets and lawn scrap (weeds).

  • We have to assume that not all the weeds have gone to seed - this will be a varying percentage based on how slack you've been. Even assuming a high percentage, it's still a percentage. Not all the weeds will have seeds to begin with.
  • On the top it goes - the plants dry, seeds drop in. Now in your carefully balanced and cultivated garden, does EVERY seed you plant germinate? I have a pretty high germination rate in the garden proper - but not EVERY seed - so thrown into the composter? On top where all the stuff that has yet to break down into 'the gold' is?  No, we are dealing with a percentage of a percentage.
  • Birds, Squirrels, and other critters jump in my bin and peck, scratch, and burrow. Some of the seeds that drop will be eaten.
  • They get covered and rained on, and hosed down. Too much water and seeds can rot - so out go a few more.
  • Some may sprout (may, not in my tub, ever, but may!) only to be covered up by more stuff - blocking the sun like a kids blanket left on the lawn for a week.. they yellow and die before reaching maturity. More seeds off to meet the weed gods!
  • They slowly go down into the bin, as things break down around them heat increases. Heat that's trapped in by more stuff going on top, the sun beating down, moisture heats up to a point where it's no longer beneficial to the seed..and now it's waterlogged covering no longer protects it. More stuff on top, more pressure.. a LOT will break down, rot, or just be cooked to the point where they are useless.
  • Down down they go, things cool down a little as they get down to the bottom.. whatever few seeds are left now contend with earthworms and other little bugs.. all the while that relentless moisture breaks them down down down.
  • In the end the tiny tiny percentage that by some miracle survives the year long break down process to good compost.... they get put into the garden and take root. Well that's when the last line of defense kicks in - Me.. out on a Sunday on my 10 minute weekly weed of the garden. That ain't something I planted? Out it goes... Of all those potential weeds, if any make it back - they get a one way ticket back into the bin to see if they can pull a 'Houdini' the second time around.

It's not the weeds in the compost you have to watch out for, it's the weeds still in the yard.

'Roughhouse Composting' - Nature has been doing this process since the world began, without us babysitting it. Unless you're trying to brew a specialty fertilizer - you're worry and work is better spent elsewhere.

Another one you'll see with regularity is on the subject of Vermicomposting  - which we all know about because I never shut up about it.  'use only plain white unbleached paper' or 'use only distilled water' - I think they're missing a very important part in these statements, and that is they should start with I.

"I only use plain white unbleached paper". - and even then there is rarely an explanation.  For someone that is directly wanting fast processing to end up with a marketable professional product - this makes TOTAL sense, or for someone breeding the worms for product.   But this seems to go through the internet like Moses coming down the mountain and becomes 'THOU SHALT NOT'.

For several years now I've been busting down my junk mail and making good fertilizer without ever renewing my initial investment, or ever having a 'worm holocaust' incident of any kind. I've never had a mass escape/suicide - I've never had a noticeable decrease in population (only in output).

 I can tell you first hand that the amount of pre-sorting you do on what goes into a worm bin will directly affect your clean out.  But only in how much sorting of inedibles (plastic shreds and the like) are at the other end - I can tell you that thin paper will likely be eaten faster than bulky paper - and I can tell you that the ratio of green to brown waste in the tub will directly impact the speed at which the process takes. I can tell you that having too much stuff in a tub will compact it and may lead to a month of bad recovery....

But what I can't tell you is that glossy ink flyers, newsprint, or even the plastic lining over some packing boxes will harm your worms, or that water straight from the tap will ruin your worm bin...

Because that would be bullshit.

In my 'mission statement' posts when I started this blog I said I wouldn't do the 'garbage in and gospel out' of the internet and pass on info I couldn't confirm. But I feel obligated to also do that for misinformation.

But don't take my word for it, I'll show you. As I've documented here I clean out a tray a month minimum from my 2 little worm farms.

 This is yesterdays tray. A day early for April. Originally I was going post this as a 'wow check this out' but I figure it would suit this purpose much better. Underneath is the full tray for last month (March) - its a good display of what I'm putting in on a regular basis. The tray on top has gone through it's process - that is to say that by the time I get to harvesting it, from top to bottom has taken 4 months.  One tray a month, just about every month. It goes from that multi colored mess of junk mail and packaging to the uniform brown compost in the top tray.


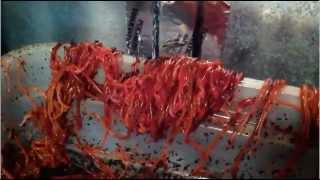
Lets have a closer look. It's nearly entirely devoid of inedibles - anything that could be broken down was broken down. In fact in this tub the amount of waste that wasn't reclaimed to castings could fit into a shotglass - I did have a picture, but as I said, camera has been playing up lately. That's 20 odd pounds of start product that 'shouldn't be used' broken down into 10 odd pounds of fertilizer.


It just keeps on going...
The process doesn't stop at the tray though - this is from the bucket I store my castings in - a walmart 5 gallon bucket with sealed lid.  The second bucket I had to buy (as my first was filled over the winter.) with about 1/2 inch filled at the bottom. Looking closely you see worms in that too - even after you sort and separate worms and as much uneaten stuff as you can, cocoons hatch in there and even sealed, worms eat, rise to maturity and breed. Even when stored in a sealed container, they are still breaking down the trash.


For some reason this camera angle looks crazy - and doesn't do the volume justice. At the end of the cleanout today it went from a bit under 1/2 inch at the bottom to over 3/4 full. just doing an 'arm lift guess' it weighs around 30lbs.

One tray wasn't as clean as the first, but it was still very clean. What is in there will be broken down further and I'll pick out bits and pieces as I use it.  But as you can see - tap water and whatever I can fit through the shredder.. absolutely no ill effects.

There's no need to coddle your compost unless you want a specific result. If you're trying to multi-task it (as I am) such as reducing household waste as well as turning it into a usable product for yourself and friends - you really can't afford to.  Nature has been doing it since the start of time, and will be doing it long after we're gone (in fact, we're going to aid the process eventually). If you need specific answers to questions on the subject, the best place to start is by asking a professional (such as Uncle Jims Worm Farm) and getting the info first hand.

Now, if you're someone who is making high grade fertilizer, or raising worms, or doing something a certain way for a certain result - I am in no way denigrating what you do or trying to discredit it.  But for those that aren't - please check your information before passing it off as gospel. If you're putting yourself forward as some kind of information source then have some journalistic integrity. That others may look at what I write and use it as a learning tool, for me, is a deeply humbling thought  rather than an ego boost. I respect my readers too much put something out there that I haven't personally researched, and where possible tested myself.

Anyways - lets put this pile of poo to good use!

Onwards to planting!


Thursday, August 8, 2013

As The Worm Turns - Composting update

Worm Poo Day (usually the 1st) has come and gone twice now, and I haven't posted much on the subject for a bit.  July was a bit of a letdown, there really wasn't any point in harvesting, let alone posting about it.  Trays were compacted with unfinished papergoods, and the castings that were there weren't worth the sort.  So trays were swapped and we got on with life.

The summer heat wasn't kind to the process, as without central AC in the house (the duct work is there, but when the previous owner took off with one of the units, and the old clunker left behind shat itself last year - its an expensive project on the 'to do' list) the workshop area gets quite hot.
A box fan was put in front of the towers, and that helped quite a bit.

August was much better, with about 10lbs of castings from what was a rather difficult sort.  Some cardboard along the way was plastic coated, so lots of little stips of plastic to be sorted. The worms themselves had retreated to the cooler lower levels of the bin, so lots of worm sorting too.  This aside, the quality of castings was quite good, and although it's not up to the old levels, it's a lot better than nothing!

Some adjustments have been made as well. The idea of 'mo trays = mo fertilizer' doesn't really hold up, as you get more compacting with more weight - I've taken the 5 stack back down to 4. This means that I'll only be putting material through one tower this month.  I'm also going to  rework the harvest schedule to only harvesting from one tower every month.  Now at first thoughts you may think that my output of fertilizer will half - but my thoughts are that this effectively doubles the time the worms can work on each tray.  Since at the end of the month I still have a big sort of uneaten cardboard and paper in the tub, my problem isn't underfeeding.  Given more time, I'll only be getting a single tray, but that tray should have more castings of a better quality.
This extra time being left alone should also give more time for them to increase their population.  Even with the heat, that hasn't been an issue, but a higher population in each tub will increase productivity.

I'm once again thinking of expanding the worm farm and adding a tower.  This will be an investment of some 100-120 dollars (given tower, worm, and possible upgrades all round) , so I'll be putting in a lot of thought before I bite the bullet.  My last addition I took a tray from the old system and used it to 'kick start' the ecosystem, which sounds like a solid plan - although it still took me 4 months before it was in full swing - this is exactly the amount of time it took for new worms in a new tub, AND decreased the working population on the main bin.  Albeit I did overzealously put that new tub into production, and made enough other mistakes that I can't objectively evaluate that plan. I'm currently flip flopping on whether to start one up 'from scratch' or to a tub swap and just take things slowly.
A third option would be to take a small population of worms and put them in a separate home-made container and build that populaton towards starting a new tub and monitor it's progress and population....

Decisions, decisions... but not any I need to make until Autumn/Winter.

We have nearly reached a point of no leftover papergoods in the house.  The outside compost heap has been eating those for the past few months (both new and old shredded goods, and all large packing boxes) and with the fast growing summer grass, has been fed constant grass clippings as well.   It is STILL only half full - maybe an inch over half after last weeks mowing.  I'll continue to use this as the primary outlet of paper goods for a few more months until I get to an absolute zero balance of paper waste in the house (this will include the abundance of boxes still here from the move in a year ago, storage boxes, and the ongoing day to day of regular household trash).  I'm really looking forward to seeing some of that compost in Spring - if all goes well it may be the last time I buy potting mix/garden soil.


Sunday, June 2, 2013

Vermicomposting - Happy Poo Day!


The first of the month! I'm lucky it happened on a Saturday as I've been out and about all week with landscaping work - so I'm happy to devote a day to my own yard and especially to the worm bin clean out.  As I've mentioned, some minor issues set my worm compost production back by a month - heck of a thing to happen at the start of Spring, but we've soldiered on with liquid fertilizer only. So although things aren't back up to 100% production, they're much improved.

What it's all about is to get from this:

To this:

And have that happen every month.  Now as you can see there is still stuff in there that hasn't been finished - some of it is bits of packing tape and thin plastics that were attached to things (which I didn't successfully weed out pre shred) - and some of it will be compacted cardboard and paper.  Usually it's a bit more finished than this - but it's a LOT better than what I had last month (where I skipped harvest altogether as it would be a waste of time).
In your own bin you could leave it till it's completely turned over to castings - this would save yourself a lot of sorting time and the quality would be great - for me, I've set my garden up with this as the engine that's supposed to drive it - I can miss a month here and there but ultimately I need all the castings I can get - This month was in the 10lb range, which is on the low end of what I was getting pre new bin hiccups.  Enough to do what I need to get done this month.

So, how do you harvest a worm bin anyways?

With a tower or tier system it's very easy - we take advantage of the worms natural disposition to avoid light to do a lot of our work for us.  It requires a little setup  - so we'll step by step it.

Setting up the workspace - stuff you need.
I like to get myself all setup organized - I sort my bins by hand, which is a bit of a dirty job - but no dirtier than weeding really.  There are people who've made machines to do this process for them, I think they're very cool and I'd like to eventually build one (and when I do - you bet I'll show it here) but that's a project for Winter, and Winters budget.
One thing I should make note of is that my first bin has 5 trays - if I harvest it every month then the scraps in the new level have 5 month to process, the downside is each tray can end up weighing up to 30lbs -so when I move this outside I have to lift around 150lbs and move it from the workshop to the back porch. When I go to remove that bottom tray, it's another 120lb lift.  Let your level of mobility dictate how high you go - better to have several tubs of a couple of trays than a hernia. For instance I suggested to my Mother to leave her system at 2 trays only. She keeps it outside, so she only needs to lift one tray out.  Mind you I'm now the one with the family of 5 and she's got MUCH less scraps that need disposing, so it works out.

Anyways the equipment list
  • 1 container for unprocessed bedding and worms.
  • 1 container for 'undigestables' aka plastic trash
  • 1 small container for things I might want to put back on top of the new bin (corn cobs, eggshells) once all the worms and unfinished bedding go back in.
  • 1 bucket to put my finished castings on
  • 1 bucket containing my coconut coir
  • a small green trowel I stole off my daughter for scooping up the casting

 First thing to do is swap out the bottom tray and put it on the top. This way we can use the worms natural aversion to light to help us sort out worms from castings - As you take material from the top and sort it, the worms will burrow down, eventually going into the tray below.  It won't sort out 100% of the worms, but it will take care of most of them for you.

Under that bottom tray you see the cloth screen in place to stop worms and castings going into the runoff tray.  Here you'll find some nice fine castings - I take the cloth out and give it a squeeze - all the liquid that comes out will get dumped onto a couple of plants.  The castings then get sorted out for any worms. Worms are put into a small container with damp coir, and the castings are put into the castings bucket.
Simple.


We put the stack back onto the base, the tray that was on the bottom gets put up on the top, and we're ready to sort out our castings.  Usually for me the biggest things to sort are things like plastic backings on cardboard, packing tape, and other undigestables.  I try and sort out a lot of it before it's shredded - but there's always going to be stuff in there - I don't try and sort out every little thing either. A rough sort to get the majority of stuff and as many worms and cocoons as I can find.  Any excess paper goods I can pick out later, or have them finish composting in the garden itself.
Black Gold
You get a handful and start sifting it between your fingers - paper and worms in one tub, castings in the other till the tray is empty. It usually takes me 15 - 20 minutes to clear out a tray - and during high production I can end up with anywhere from 10-15lbs of castings.
If I were to do this with some kind of machine like a trommel, I'd probably have to have a period of drying the castings out beforehand.

The final step, you take all the compacted paper that didn't get eaten and loosen it by tearing it up and fluffing it, then dump it back in the now empty top tray. Get your container of worms that you picked out while you were sorting and put that back in top as well.  Some fresh bedding on top, and I usually put some coconut coir over that - just a light cover. Then put your bin back to where it came from and moisten it down - some people use a spray bottle to mist them, I just use a watering can.  Finally for me, I sprinkle some corn meal down over top a little treat.

What do I do with the castings?

The final product can be used in several ways. I mix in a couple of handfulls into vacant garden squares before replanting them, I mulch the tops of squares with their maximum amount of seedlings.  It can be brewed into a compost tea for a liquid fertilizer that can be used either on the soil around the plants or sprayed onto the foliage (this spray also helps deter some insects, but is also very useful if you're cloning plants that haven't developed a proper root system yet).   So the 10lbs I harvested won't go all that far this month, but as both bins come up to speed I expect to soon be getting a lot more.  Ideally I'm shooting for 20-30lbs a month, which would mean I'd have taken care of 40-60lbs of my own trash every months - for the green minded that adds up to a lot of stuff not in community landfills each year. (about 720lbs).

Anyways - Sunday is now here (as I didn't get this typed up on Saturday) - and a whole lot of yard/garden work remains to be sorted out before Monday! 


Monday, May 6, 2013

Vermicomposting (worm farming) - Common Problems.

Although it's a relatively simple process - turning junk mail and garden scraps into fine compost and fertilizer, it's not without it's pitfalls. The internet, with as much information as it gives you access to, is also rife with misinformation.
Sometimes this misinformation compounds, and just because many people search for a solution, doesn't always mean the most found answer is the right one - I'll be giving one such case later.
Here, on this blog, I'm only going to give answers to problems I've solved personally.  And if I ever accidentally give some misinformation, feel free to discuss and post your own experiences.

In past posts I keep talking about the bin as an environment - a point I want people to keep in mind especially in this post.  You're trying to create the best possible conditions for the worms to do their job and for scraps to break down as efficiently as possible. So lets review what that is:

  • Worms like a moist environment - they breathe through their skin.
  • Worms like dark places - so the bin should be opaque.
  • Worms don't like an acidic environment - even though the process that creates their food also creates acidity.
  • Food and bedding should end up around a half half of brown to green scraps.
  • Worms breathe air, so the bin should be well ventilated. 
Keeping these points in mind, it's not that hard to troubleshoot most problems - so we'll go over the more common ones.  Nearly all problems I've felt are caused by and solved by either moisture, food, and bedding.

My Worm Bin Smells

A well run bin shouldn't smell with the lid on. It should hardly smell with the lid off, and at most should have the same smell as soil - even this shouldn't be noticable from more than a foot or so away.
Even that small scent of the bin can change depending on what you've fed them. When I fed mine a chopped up melon that we couldn't finish there was a sweet smell to it - recently when I've had a high amount of paper - there was a musty smell to it.  But these are such that you have to have the lid off and actively have your face over it and smell.  This isn't the smell that's a problem.

Bad smells, and strong smells from the tub are caused by too much food. As scraps break down the worms feed off the microorganisms causing that. Too much food, it breaks down, the worms can't eat it up enough to keep up with the breakdown - and you have the smells that are associated with that stuff breaking down by itself... makes sense doesn't it?

The Solution:  Simple - don't feed them till they can catch up.  I'll also put a bit more bedding down on top - it can filtrate the smell a bit and also head off other problems that can come from too much food.  Leave them be for a few days, check for the smell, if it's back to normal - check the food by lifting up the bedding - if it looks like they're doing their job - go back to your feed schedule - if not, leave for a few more days - repeat till fixed.  Worms will be attracted to the food, and they adjust their population to the amount of food - so they will eventually solve this problem if left alone.

I Have Flies In My Bin

Be it normal flies, or more commonly little gnat like flies (fruit flies/vinegar flies) circling around... I call them 'funk flies' because they remind me of the spots they put around people and things in cartoons to denote something funky smelling... anyways - if you had the smell, you might also have the flies.... and the problem is one and the same - too much food.  When things break down and sit around, other things can come to the party. Luckily the environment we've created for them doesn't attract a wide range of critters - but flies are one that will come, like mico vultures coming to the feast.
The solution is also pretty much the same - don't feed them.. with the addition of adding more bedding.  The flies can only eat what they can get to - so adding more bedding means they can't get to the food, so they bugger off.  My own personal solution to rid yourself of them in under 24 hours is putting a thin layer of coconut coir over the top and wetting it down - it makes an effective barrier that the flies can't get to - and problem solved.

DO NOT use pesticides in your worm bin - no brainer, but I have to mention it.


There Are Lots Of Little White Insects In My Bin!

This is the one that I've seen the most freakout posts about on the web. When I mentioned information on the web, this was the one I was referring to. Lots of little white bugs hopping around in the top of your bin.  I saw them called lots of things from mites to white flies, to white fleas to dust mites.. I read of people cleaning out thier bins and dousing them with pesticides or sterilizing them and starting over with new bedding, sometimes new worms - and always these things returned!
Whats worse is others followed these peoples advice blindly, when a little more research would have told them exactly what they were dealing with.
Have you seen these guys?

The culprit looks like this from a distance - when disturbed they jump and scurry around on the top of the worm bed.  I have to admit I was a little unsettled, and searched the web for a solution to what seemed like a worm bin infestation.


What you're looking at isn't a mite, or a flea, it's a hexapod currently referred to as the 'springtail' - to be more specific - the soil springtail.

It is possibly the most populous creature on earth. Up to 100,000 populate every cubic yard of active topsoil on the planet.

They cannot live in topsoils that have toxic elements, nor can they live in dry conditions - they prefer a moist environment and their primary food source is the breaking down of leaves and other plant material.

Although some very specific breeds are noted as an agricultural pest -  the common soil springtail is used in tests to study soil toxicity.  They are not harmful to people, animals, or plants.

So - sit and think on that a bit.  We have people cleaning out, sterilizing, spraying, washing with pine-sol and other chemicals, to get rid of a creature that not only lives in the exact same environment as our worms - in fact loves the exact same conditions - eats the same food - and can only live in soils that are not toxic (ie. healthy).  They can't survive outside of the bin, as it's too dry, and they aren't harmful to you or anything in your house.  Kinda like your worms actually.

Springtails shouldn't be a sign of doing something WRONG, they're a sign of doing something RIGHT.   Good healthy non-toxic material in a moist environment.  What do I do about them?

Absolutely nothing.

Some put forward the argument of 'competing for food', which I say 'bollocks' to.  Nearly all the problems we find in a worm bin with feed deal with overfeeding or ratio of feed - and the rate we feed our bins mean the springtail has no impact at all -  if anything it's going to be a benefit in eating up excess food - even so they are no match for the mighty compost worm, who eats up to it's own weight in a day - if anything the worms would starve out the springtails.  They regulate their own population as well, and live side by side in the worm bin environment.

Other Critters

There are other critters that can live in a worm bin - actual mites I've seen photos of in a bin - but as I haven't had them, I'm not going to comment on do's and don'ts of the situation. You'll have to do that one for yourself - just remember to always research more than one source, and if possible a proper scientific study.  Academia trumps internet speculation every time - and always remember your worm bin is not a dog house - it's an environment for breaking down compost.


Worms Are Escaping!


Hopefully not like this - I love that picture, and no it's not one of mine.  I've not had anything like that happen to me, but it could happen to anyone.
There really isn't much keeping a worm in worm bin, not even in a store bought one. I have thin fabric mesh on top and bottom, and even THAT isn't a guarantee of keeping them in 100% of the time.
So the only thing keeping them in is them wanting to be there - if we follow that thought it doesn't take a genius to realize if they want to get out - there's something rotten in the state of Denmark (to quote the bard).

So, to trouble shoot.. lets look at the bin. Is the bedding dry? Worms don't like dry. If so - water it down with your prefered method.

Ok so it's not dry - is it too wet? That one's a little harder to detect. Wet is good but too wet can be a problem. To be sure if your worm bin has a drainage spigot, turn it on - if lots of water comes out, you've found the problem. drain off the excess and go fertilize some plants with it.
I get worms going to the top of the bin sometimes when I water down on a Wednesday and Sunday.  I've taken to opening the spigots periodically for a couple of hours afterwards.  This gets any initial excess out and avoids the problem.

Take a sniff.. does it smell bad?  Too much food - follow the directions under that problem.

Doesn't smell BAD, but smells a little sour?  The breakdown of foods is making the environment a bit acidic - cut back on food, add eggshells, fluff them into the top of the bedding, add more bedding and make sure it's all nice and moist.
This problem won't solve instantly - but should right itself over a short period of time as the new bedding you add and mixing the bed up will disperse that a little, and the eggshells due to the magic of calcium carbonite (which only dissolves in acidic environments) will buffer your PH back to neutral.

Are they getting good ventilation?  If you keep them in a closet - leave them out for a day and observe - maybe the air in there is a little stale.  I keep mine next to a duct register on the floor - cool in summer and warm in winter, and plenty of fresh air.  I should note this is also in my workshop, so if I ever encounter 'the slithering mass from the drive in theater' the rest of the family doesn't have to deal with it.


Are the worms new?  This is one I can't scientifically back up - but both times I've had new worms they've taken time to settle to their environment.  Maybe they get stressed, maybe it's unfamiliar, who knows... Give them a bit of time to adjust.

Is the bin too full of castings?  You'll know this one just by looking at it.  if all you see is castings - the bin is now too full of them - the worms can't live in their own concentrated poo (I wouldn't want to either) - so its time to add a level to your bin (if you have the tower variety) and add bedding, or it's time to harvest!

And the final thing you should do with ALL these cases:  Worms don't like light. They burrow away from it. So after you've carefully put back any escapees or gently scraped them off the lid of your bin, leave the lid off and a light on.  They'll naturally go back under.

Another trick I do if it happens again - I put some dry bedding on the top. I don't moisten it.  Worms need moisture to breathe, and so they avoid the dry - between the dry and the light - the worms stay down in their home.

How about the temperature? Worms are best around 50-70 degree mark. Most worm farms come with a 'worm thermometer nowadays - but to tell the truth it's just a meat thermometer you'd stick in your chicken - about 3 bucks from any store. Although it's more than likely too hot or too cold will just make your worms slow down, which brings us to........

My Worms Aren't Working!

It's a vague complaint that I've heard - so we have to find out what 'not working' is.  For example my Mother's tub she thought she had no worms, as she didn't see them (even when sifting through some of the bedding) - although she gave them something they didn't like (an abundance of bread) and they all came to the surface quick smart. And after solving the problem of too much food/worms escaping - the question of them working was answered.

Mostly I take this as 'my worms aren't making my compost fast enough' - They're not performing 'as advertised'.  Well firstly you have to realize the 'consumes up to it's own weight' means just that 'up to'.  It could mean from nothing.....up to it's weight.  Also there are worms and there are worms.... there are teeny, tiny, fit 100 under your fingernail, baby worms and there are longer mature worms, and there are even European 'super' worms, a family of composting worms that are much bigger (I recently bought 250 of them, and I'm rather impressed) - up to 2 - 3 times bigger than the red wriggler.... and they'll only ever perform when they're happy... in a nice optimal environment.

Check the temps. As I said above, a meat thermometer can tell you if it's too hot or cold, and that can slow your worms down to dormancy in the cold or hot - or if too hot or too cold, kill them (although the temps for that, you'd be freezing your arse off or sweating it off respectively).

Look to your food mix - half green, half brown.. This isn't a scientific formula, nor is it like baking where you'd measure those ingredients exactly - it's a guideline. But it's THE go too for non productivity in your worm bin.  Too much green food and we see problems at the top of the post - too little or none and things start taking a loooooong time to break down.

I'm experiencing this myself due to my own boneheadedness.  After moving house I found myself in the age old problem of 'look at all this trash from moving!'  Normally I'd have spent 10 months getting rid of it in bits and pieces - because lets face it, I'm not ashamed to say after moving at the best of times I find myself broke as a joke and forking out money to the landfill doesn't outweigh my putting up with cardboard boxes in a corner of a storage room or the workshop... only now... I have worms to eat them!  Of course I grossly underestimated the amount of stuff you accumulate moving a house of 5.   Normally I'm pretty good on the mix, but add to that our deciding to buy a bunch of stuff for the house at the beginning of the year (new TV, toys for the kids, other goodies) and suddenly there's an even BIGGER surplus of paper goods, and our treating ourselves added to a lack of available green scraps... so being a little absent minded at the time - I went about the routine of feeding for a couple of months - with very little veg scraps - I honestly didn't notice at the time.  The output of castings went down a little the first month - and a little more the second month. Last cleanout at the start of this month (I wanted to do an article on the harvest) and I noticed there was so much unfinished paper and cardboard that sorting out the castings would be a waste of time. Usually I have a big container of castings with some unfinished paper in there - this was the opposite.

I've since added more green scraps to all the levels of the bin, but only time will tell if that picks it up, or if my own oversight has set back my casting production for several months (funnily enough - when I wanted it the most).  Goes to show, it doesn't matter how much research you do, or how much knowledge you accumulate - it's no damn good if you don't implement it.  Live and learn - we are the sum total of our mistakes, and you don't learn that much from a blind success.  The only stupid mistake is the one you make twice.


That about wraps up all the problems I can think of - as you can see they all deal with moisture, food, and bedding.. in 99% of cases you can solve any problem in your bin by troubleshooting these 3 things things... Keeping worms IS easy, it's just not totally idiotproof.


Friday, April 26, 2013

Vermicomposting (Worm Farming) - The Care and Feeding of Worms.


   I wanted to write this on Sunday after I did my worm feeding for the week, but that turned over to Monday - where I found out my new neighbor was moving in and their help for the day had failed to show up, Tuesday - my Wife's birthday, Wednesday - ANZAC day (Australian veterans day of remembrance, which I observe being an Australian veteran myself). Thursday... I thought today was Thursday, but it's Friday, and I spent it fixing the bathroom that adjoins the master bedroom. We now have a working sink and toilet - but the shower still needs to be torn out and replaced.

So, Friday. A nice sunny day - and a couple of hours dealing with some garden stuff, and I can settle in to finally pen this article.  This is gonna be a LONG one - so strap in and get a coffee.

So, you want to start a Worm Bin?

We covered some things you'll need and some things you'll want in the last post. Your outlay could be as little as 30 or so dollars just for worms - or up to around 100 dollars (my start point) for a cheap worm tub and some starter worms, upwards to who knows where. I've seen some people online pay ludicrous amounts of money to buy or build massive systems, or fall for some snake oil - internet BS and pay for things such as 'breeder stock worms'. There is no such animal. My worms are the same as your worms, are the same as the worms at the farm I bought them from.

Now after saying 'worms are worms' I'm going to contradict myself.  There are different varieties of composting worms - the European Red Worm (aka the Super Red Worm at Uncle Jim's Worm Farm) which IS a slightly different animal. They are bigger and apparently like to burrow a little deeper, and some sources have said they enjoy paper goods a little more - I bought 250 to put in my second bin to test this claim (as I take very little as 'gospel' on the internet unless there is overwhelming evidence or scientific proof to back it up).
They can co-exist with normal red wrigglers with no problems according to my dealer.  If you have questions about species and performance - ask your worm dealer directly. If they don't answer you, use another dealer. I've sent questions to Uncle Jim's Worm farm several times and always received a quick, courteous and informed answer - I can't recommend this guy enough.
99.9% of people are just going to go for 'the red wriggler' - tried, true, no nonsense, composting worm - and everything I just said can be safely ignored.

An obvious point: Make sure you buy, build, order your worm bin first and wait for it to arrive. THEN order your worms :)  Sounds obvious but in the heat of the moment I had to hold myself back from the 'well they'll all arrive around the same time' mistake.

When they arrive you'll want to get them settled.. set up some fresh bedding (most worm bins you buy come with a brick of coconut coir - hydrate it and lay down some of that). A couple of inches will be fine. If you didn't read my spiel on the benefits of coir - or just plain ignored it - some shredded moist paper will do fine.
Empty the worms on top and leave the lid off your bin. Worms don't like sunlight and they'll burrow down into the bedding over the space of 1/2 hour (they're probably going to be lethargic after being packed up and shipped).
What I do at this point is check the moisture and sprinkle some corn meal over the top for them to eat.  I let them settle for a few days before feeding them proper.

During this time your worms may come to the surface or try and escape out the top. All these things I'll cover in 'problems' again - but for now there are more than likely only 2 things you need to do to control this till they settle:
1. take the top off the bin till they burrow down away from the light.
2. check the spigot for runoff of excess moisture. Worms like damp, but aren't fond of swimming.

I've observed this 'new worm escape' even in an established bin, and I think part of it is the worms adjusting to a new environment.  Once settled, and you find your groove with maintaining the environment for them - they'll happily live in there and not want to leave.

 What to Feed Worms.

I touched on this on my introduction post - and it it's worth remembering: Worms don't eat the trash per se , rather they live on the microorganisms that occur as the trash breaks down.  This is why if done right there is no funky smells.  So keeping this in mind - it's important not to overfeed the worms to maintain this.  Now this isn't terribly hard, but sometimes when you start out you can get a little overzealous.

There are lots of foods worms like:


  • fruit vegetable scraps, stems, peels
  • egg shells
  • grains, cereals, bread, corn meal
  • beans, rice, pasta
  • coffee grounds & filter
  • tea bags (remove staple first)
  • dead or wilted flowers
  • dry grass clippings & leaves
  • newspaper & junk mail
  • cardboard & paper egg cartons


There are some things they especially like.

  • watermelon
  • cantelope rind
  • mango skin
  • banana peel
  • avocado skin
  • corn on the cob
  • pumpkin


And finally some things you shouldn't put in at all:

  • meat, poultry, seafood, bones
  • dairy products (butter, sour cream, whole eggs, cheese)
  • oily or salty foods (peanut butter)
  • acidic foods (pineapple)
  • sauces or processed foods
  • citrus (lemon, lime, orange)
  • onions & garlic
  • spicy foods & chili peppers (jalapeƱos)
  • plants or grass that has been sprayed with pesticides
  • poisonous plants
  • soap
  • glass, plastic, tin foil, metal

I use a general rule of thumb:  No dairy, no meat, no overly processed and nothing absolutely stupid - but some people have a strange definition of stupid so we add things like 'pesticide' to the list. Whoever even asks if it's ok to put pesticide into a living environment we're trying to create is a bonafide dumbass.

Now - some clarifications, and some tidbits you may find interesting:

Eggshells .  I put them crushed in my bin - they pass through to the bottom and I put the in the top again. They eventually go away but very slowly. Some say 'they get eaten really slowly' but I'll put forward another idea:  Worms like a fairly PH neutral, coolish environment, but the process of organic breakdown creates heat and of course acidity in soil - lowering the PH.  Eggshells contain calcium carbonate - the same thing you find in seashells and is used in common aquariums to buffer the PH of the water.  Calcium carbonate dissolves in an acidic environment, bringing the PH back towards neutral.  Thus this 'slow eating' is probably due more to them maintaining the PH level of the environment.
I put them in whenever I feed mine scraps.  I give them a rinse (because they technically follow the 'dairy' rule - and I want the shell - not stuff inside) - then I put them in a ziploc bag into the freezer.  Frozen eggshells break up VERY easily.  Another trick is to put them in a stackable plastic cup (out of the freezer) and put another empty cup inside to help crush them.

Citrus skins and onions - I actually put them in mine, but in LOW quantities and always with eggshells - I've had no side effects doing this as I think the eggshells help neutralize the citric acid content.

Corn on the cob.  I pop one or two halves when I get them in every level of my bin. I find it's one of the things I sort out at the bottom and put back in the top - I've had one in there for 12 months now gradually getting smaller and smaller. The first time I found one had traveled from top to bottom I was tempted to throw it out - I found under the castings lots and lots of worm cocoons.  As much as they liked the corn, they provided an excellent place for them to lay eggs.  So now I make sure every level has one or two.  Anything that maximizes the amount of cocoons that return to the tub is a good thing.

When feeding it's a good idea to try and keep a nice balance of 'green' scraps and 'brown' scraps - oversimplified we can say that scraps and other food that breaks down is 'green' and paper, cardboard goods are 'brown'.  Yet another mention for coir - technically green though we use it in the same way we use brown goods.  This is not an absolute - this is a guideline to keep a nice balanced environment for them.


How To Feed Worms.

When you're starting out you'll want to follow these guidelines until your worm bin matures.  It's really really simple.  Look at they surface area as quadrants.  Pull back the bedding on a corner, put in your food scraps, put the bedding back over - add a little more on top (coir, moist paper), and that's that.  If you find yourself a bit forgetful, put a sticker on the corner you just put food in.
Next time you have scraps, check the progress of the first corner - if it looks like it's doing well and getting eaten, add to the next corner. Add a little more bedding on top when you're done.
Work your way around the bin from corner to corner - ideally when you reach the first corner the food will be mostly gone, and you continue along, slowly building up your bin.

When you reach about an inch or so from the top, pop another level on, put down a layer of bedding as if you had just started that bin, and continue.  The worms will travel up to the next level in search for more food.

You'll eventually get to a point where the population multiplies to keep up with your food scraps.

Doing this also helps us keep up with our 'green/brown' ratio without even paying attention.


Now that I've said this - I'll totally break all those guidelines and tell you how I feed my worms.  Remembering that I have a family of 5 and that getting rid of my trash is every bit as important as the castings.

I put all my veg scraps and food for the critters into a bowl that's kept in the freezer - I do this as soon as I'm done with my veg (cut off some tops, peel some carrots, straight in the bowl in the freezer - likewise eggshells).  On Sunday I get the bowl, get out the frozen puck of worm food and break it up into the top of the bin, cover it with paper goods and water it down with a watering can. Not much - just enough to moisten the new bedding.

The frozen food thaws, cooling down the bin a little, the worms eat it.  Several times on Sunday I'll check the spigot and drain off the fertilizer I'll use that afternoon for the garden.

Wednesday I do a light cover of bedding and another water down, drain off for my mid week fertilizing.

Now - I wouldn't recommend doing that method unless your prepared to check on your worms a fair bit, or have had your bin running for at least 12 months. That's strictly a 'power use'. My primary (first bin) has run this way for nearly 7 months with no visible downside and a monthly harvest of castings.

This article is getting longer than I intended, and I still have much more I want to discuss on the subject - so upcoming articles will be about procuring food for worms and of course worm bin problems.


Saturday, April 20, 2013

Vermicomposting (Worm Farming) - an introduction

If I was limited to only promoting one single idea on gardening, it would be vermicomposting aka worm farming.  There are so many benefits to this that I nearly get writers block trying to sort the information into a good starting point.

I'd read about it several years ago and dabbled ignorantly with it in garden #1 - I saw first hand some of the effects of it while composting with garden #2 - then researched and experimented with it properly before starting this garden. It is currently THE anchor point - the part of my garden experiments that not only makes a lot of what I want to do possible, but also has the biggest impact on running costs, as well as providing a benefit to the rest of the household.

An extreme simplification:  I put garbage in one end, I get fertilizer, pesticide, mulch, and soil amendments out of the other.

It reduces my cost of these things so close to zero, we may as well call it zero.

I'm going to be breaking this down into several posts - this one will deal with basic info and setup, a future post will deal with maintaining, care, and feeding.


It's a process that revolves around 'Eisenia fedida' commonly known as the 'red wriggler' worm in the US.  It's important to point out that this is different from what we commonly call earthworms. These are composting worms. They live in the top few inches of earth, usually in moist debris (whereas the earthworm burrows down into the earth - these are also useful, and should be promoted in the garden, but they are a separate thing).


In optimal conditions the red wriggler can consume up to it's body weight in material per day (although one half is a more realistic expectation).  Although  we generally say 'they eat the trash' what they actually consume are the microorganisms in the material as it breaks down - it's splitting hairs and I only bring it up so people can understand why this composting method doesn't smell, and to bring up one of the strange mysteries of the process: Although the decomposition of organic material produces microorganisms beneficial to plant growth - the castings left behind by the worms will contain 8 times more than their feed.  The physics nut in me though will point out that there seems to be a ratio of around 2 to 1 of feed weight to final castings, so we can apply the law of conservation of energy to explain this.
These castings contain approximately 5 times more nitrogen, 7 times more phosphorous, and 11 times more potassium, 3 times exchangable magnesium, and 1.5 times the calcium  than normal soil. The castings have a balanced PH, and the process by which they're created removes pathogenic bacteria (my son, who shoves EVERYTHING in him mouth could do a handful of it and it would be less harmful than the sand he regularly tries to eat out of the sandbox). In terms of plant growth factors, they've been likened to seaweed.

It outperforms chemical commercial fertilizers, and you can use as much as often as you like because you can't overdose the plants on it - you can't burn their root systems like you can with commercial fertilzers and plant food.  Which makes it not only effective, but idiotproof.

I put it in the soil when I dig it over as an amendment. When all the seedlings in a square are sprouted and at their second leaves I'll mulch with it as it holds moisture very very well while also helping prevent weeds breaking through - while at the same time fertilizing the plants.  It can be combined with water (or slightly more elaborate recipes) to make a compost tea that can be sprayed as a fertilizer for foliage, and at the same time work as a pesticide against a variety of pests (the 'runoff' - excess moisture drained from the farm also bestows these benefits as it's usually water that's steeped in the accumulated castings).

And this is only the benefits to the garden, there are other benefits for the household.

I started looking into this in earnest originally NOT for the garden - or at least the garden was a secondary benefit.  With twins you get two times everything (especially if they're boy/girl) and that means 2 times the 'baby by-products'. Long story short - when you find yourself prioritizing your trash because your bin is filling up too fast - you have the make changes.  I tried flattening out paper goods, which helped but didn't solve the problem. I started adding paper goods to the compost pile of garden #2, which went a little further (as compost should have both nitrogen and carbon inputs - paper goods are a good way of adding the second) - but the process was taking too long.  With a single matured worm bin I was able to dispose of up to a pound of paper goods per day, that's 30lbs per month (yielding some 15lbs of castings per month).

So - how is it done?  How much does it cost? There's a plethora of sites on the web with plans for building your own from rubbermaid containers, wood, just about anything. For use inside or outside.  When I was dabbling I built a small one out of a old bucket that came full of kitty litter. Your level of cost depends on you. Personally this is one area that in hindsight I feel that putting a bit of money out there is a good investment.  You'll save yourself a lot of time, and if you're just starting you can minimize 'newbie error' by using a tried system.

Worm Bin

This is the actual one that I use - it's made by Vermihut and costs around 50 - 75 dollars depending on how many trays you want (mine came with 5). There are others on the market of varying costs - I went for a budget solution and so far it's performed very well.  I recently expanded by bying a second one that is currently being brought up to speed.
You put your scraps and paper bedding in a tray with your worms until it fills, then place a new one on the top. As food is consumed, the worms travel up to the next layer - leaving behind castings.
The excess moisture from watering the system is drained out the spigot and used on the garden.
The method I use for harvesting is to take the bottom tray out, put it on the top, and take the castings from the top and put them in a bucket - any worms left in that top tray will burrow down to avoid the light - if you do this patiently - the worms naturally sort themselves into a lower tray - to which I put back anything unprocessed. I leave the now empty tray on the top, and the process begins anew.

Before I transplanted a tray to my new tower, I had a healthy population that would have me harvesting out the bottom tray once per month for approx. 15lbs of castings - mind you it takes a bit of time to get your bin to 'mature' to this level. Mine took 4 months before my first harvest, 2 months for the second, and I now harvest every month.
Looking at how the system works, we can say that with 5 trays - one tray harvested a month - I'm giving each tray 5 months to work to the bottom, which for me has given me very rich castings and very little unprocessed material.

Worms

It goes without saying you'll need worms.. a goodly amount of worms.  I get my worms from Uncle Jim's Worm Farm.  He has good service, a good price, and he's expanded into worm bins at a competitive price - he also sells the same bin I use at a cost very close to Vermihut's - making him a one - stop - shop.  As a side note his monthly mailing letter is usually pretty informative and funny. One of the few of these I don't flag as 'spam'.

Remember - a worm can eat up to it's body weight in material per day.  But a worm is really really small.  A rough estimate is around 1000 worms weigh a pound. Depending on how much waste you process and how fast you want your population to mature - I'd suggest getting between 500 and 1000 (I started with 500, in hindsight I would have chosen 1000).  Your 'farm' is just that - and your worms are a 'livestock' - they will breed in favorable conditions and the population will adjust to their surrounds.  Worms tend to congregate and breed in a biomass. so the better the mass, the better your breeding - this is why 500 is a good minimum start point. They are hermaphroditic and require 2 to mate.  The cocoons they lay will produce anywhere up to 20 worms, and in a couple of months these will in turn mature to breeding age.

A quick bit of fuzzy math will give you the population of my first bin. Given 15lbs of casting per month and the approximation of 2-1 feed to castings yields approx 30lbs of garbage input. A worm eats up to it's weight per day - so approx 1lb per day = 1lbs of worms - OPTIMALLY, given things are not optimal we can say anywhere from 1/2lb per day to 1lbs .. so 1000 worms to a lb = between 1000 - 2000 worms.  That's a bit more than the 500 I originally bought less than a year ago.

Besides worms and a bin for them to live in, there are few things that will help you along.  Although not 100% needed, they are worthy investments and you'll wonder how you ever got by without them.


Coconut Coir.

If you buy a worm farm, chances are you're going to be getting a brick included.  It's from the fibers between the flesh and hard shell of coconuts and is used in a variety of products. For our purposes it's a replacement for peat moss that has no bacteria or fungal spores associated with it, it also repels snails.
For our purposes it's an additive to the worm farm used to add more 'green' material when garden/kitchen scraps are unavailable, to remove excess moisture if the bin gets too wet, or as a bedding cover if overfeeding has attracted undesirables like fruit flies to the bin.
It expands in water to 7-8 times its volume - making it easy to store and easy to use. This trait also appears to pass on to the castings produced - and the castings I've made where coir has been present has absorbed and retained more moisture in the garden.  I buy it in 650gram blocks, which expands to about 'a bucket full' with a gallon and a half of water.  Shop around on the web for it and you can get some good deals - the last time I bought 10 blocks - 5 of them have lasted me nearly a year.  I purchased them for around 1.50c per block (plus nearly that in shipping) - shop around for a good deal.
Apart from use with the worm farm, coir is a good addition to your soil, adding a light fluffiness that you find usually from adding peat moss.  I'm using it as the main part of a mix for growing potatoes in.


Paper Shredder


Actually this is the exact model I bought - a 6 sheet cross cut shredder.  This was a recent addition, before that I cut my paper and cardboard by hand. I have only 2 regrets. The first is that I didn't buy one sooner and that I went with the 6 sheet over the 8 sheet.  At Walmart it cost around 45 dollars.
The benefits were 2 fold - firstly was time. as I shred 90% of all paper goods and packaging in the house, and a family of 5 - by hand I would sit at the desk in my office with a box cutter and a pair of scissors and start a movie on netflix.
Since then I get through my bi-weekly shredding in about 5 minutes.  That's a HUGE savings in time.
Secondly the cross cut cardboard and paper is a LOT fluffier and lighter, making it less prone to compaction in the bin, and smaller - providing more surface area (which means a faster break down time).  If you take this on as a regular part of your garden composting - you are going to want to buy one.  Mine is a Fellowes and I'd recommend it - it has an auto shutoff if it overheats,  and handles everything up to a packing box in thickness (thicker packing boxes it does grind and complain, but does the job - see AUTO SHUTOFF on overheating).


Lastly - I'd recommend a bag of corn mean - it makes a nice dietary suppliment for the worms. I got a bag for a buck and I'm still using the same bag a year later - every now and then I sprinkle the top of the tub for a special treat for the little critters.

That's about it for basic info and setup - In a couple of days I'll go over starting, care and feeding.