Pages

Sunday, May 26, 2013

Sunday 26th Havest and Update

Another week, man it just flies on by! It took me pretty much all week just to catch up on everything I needed to get done. So far as gardening, apart from watering and a quick overview - it's pretty much looked after itself, which is good - everything functioning as it should.  This is great as I'm now at that time of year where the blueberry harvest at the farm could happen at any moment.  On top of that a couple of landscaping jobs are turning up - surprising for this time of year, as my 'landscaping' usually amounts to 'shit I don't want to do' for most people - and that stuff usually pops up mid summer or in Autumn.

Some high temps this week saw the start of the decline of the peas - although there is new growth low on several plants as new shoots are coming out.  I trimmed them halfway down the trellis after harvesting what was on there (quite little) in hopes the rest of them catch on.
If not I'll let them thin out on their own and replant in any squares that are vacant.   I could have planted them earlier, as in mid March they were quite quick to sprout.  Either way I have a tupperware container full of shelled peas in the crisper, more than enough for a ham and pea soup.
To tell the truth, I'm not a fan of peas - boiled peas being the only food thus far that I simply will not eat.  I do like baby snap peas in salads, and I do love a mushy pea soup.
Anyways - I think they had good run, and if that's all they give me this spring, I don't think getting near 2lbs of peas from 2 square feet qualifies for a failure, I think it's a great starting point.

Much more in that garden bed going on, Kale is looking good, but I've never tried it before, and nor has my wife. I think mid week I might pick one and try it cooked a couple of different ways.

The beans never fail to surprise. On Monday I was thinking they might be the first to quit - but instead they give me much more than I thought. about equal to last week in number, but with an overall increase in average size.  Many of the plants that were picked pretty clean are already budding new flowers or putting out more small beans.
I'll certainly make sure I keep up with the fertilizer on these, and should the worm gods smile on me - they'll get some well earned mulch!.
With so many beans in the crisper, I'm hoping for a bean casserole in a couple of days. My wife makes a bang up one - and I'd love to try it with fresh (and near fresh) veg.

 Along the back bed (that I don't show too often), Corn is coming along well. Compared to what I've seen growing out near the farm on various properties (eating corn, not feed corn) -  I think this looks about right on track.  In front of them are several bell peppers.  I've had decent luck with these in the past - Garden #1 had 3 small square pots (around a foot square) with 4 packed in each - they grew short and still produced apple sized peppers that would weigh their tiny branches to the ground.
I'm trying to find 'the magic number' that gives me a good supply for cooking.  This year I'm trying 7. Six are in that row, though the end plant is getting a bit sun-fried, plus one from last year that the frost couldn't kill over by the turnip greens.

Yep, it's under that giant mass, somewhere on the end.  Actually as I speak the smell of fresh turnip greens is wafting from the kitchen. I pulled a square foot of them in order to try my hand at cooking them.
I have them slow boiling away in a pot with some ham hocks and red peppers - a shame it's too early for peppers, as it looks to be a decent sized meal that would have cost me all of 1.50 to make.
For people unfamiliar with the ham-hock, it seems to have a bad rep as somthing 'nasty' - when the truth is it's just nice chunks of ham, those bits that can't be cleanly sliced for sliced ham.  Ideal for soups and very cheap for what you get. I can make a great meaty ham and split pea soup on a budget, with enough surplus for freezing. A great feed for those days when the wife has to run around and the kids have me too busy to cook for myself.


Radishes, of course, continue to get pulled, the one square I have left devoted to them sprouted new plants in a record 4 days.  I'll keep that little factory turning over as long as I can - it's other, nearly depleted, square will have eggplant transplanted into it this week.
Anyways the harvest, not too shabby with 1 square of turnip greens pulled up.  I was thinking of replanting them out - but I think instead I'll try getting some of the overflow taken care of and in the garden proper.

Many of the long-term plants (such as broccoli, corn, cabbage) are doing quite well - better than the short-term (lettuce, spinach,beans,peas,greens). A turn around from my Autumn, where I seemed to have a nice balance. As the short term plants were falling into winter, the longer term plants and root crops were getting ready to be pulled. I still need to find the spring balance that will see me through a spring-summer.  I think the choices are right, but the timing is a little off.
Many other things are up and coming, and I'll take some snaps over the next few days - the squash is hitting a growth spurt, and looks like I'll be getting something off that real soon - tomatoes continue to flower, and the potatoes are looking like heading into their final growth stretch before dying back. Still, the meal-per-week count has gone up to 2, lets see if I can hit 7 before summer!


Thursday, May 23, 2013

You say Tomato and I say Tomahto

And in this case.. it's true.  People tell me they love my accent, and I just look at them bewildered. After all - it's all you bastards that have an accent. I talk normal!

But anyways... I was having my daily roam over the garden, checking in on what's growing - plucking out the odd weed (one of the joys of my setup is the absolute tiny amount of weeding you need to do - a pluck here and there every couple of days and you're done in minutes), when I noticed this:

First baby Tom of the year!
From out of the flowers on the Toms, the first little green ball - just poking his head out.  Now chances are it will fall off, maybe get pecked at, or have some bastard bug chew off the stem - the kids might tug it off or the apex predator of everything growing, my wifes cat, might get outside for 2.5 seconds and chew it off (as it manages to sense what plant is most important to me at any given second, and will attack it without mercy).

I figured it would be a nice break from peas and beans to do something different, and I'll be putting the relevant planting info on a page for vegetables a little later.as keeping records of such things is one of my downfalls.
When I go to replant something the next year  - if I don't have those seeds anymore - I'm kinda S.O.L.

Tom-ay-toes, Tom-ah-toes..  The feeling is they're all the same - and if you're like me (doubly so when I started gardening), you see that seed packed on the shelf with it's lovely juicy fruit in glorious color splashed on the front and you grab them - never paying mind to anything because 'Hey... tomayto-tomahto!'  And if you're lucky to have them sprout and grow you get rewarded with... some tiny little cherry tomato, sitting alone in a sea of vines that have overrun every square inch in the immediate area.

Sounds funny - but it does happen, and did happen to me.  Don't get me wrong - cherry tomatoes of a mysterious never-to-be-found again variety are pretty good and flavor packed - like little ripe bombs of flavor for a fresh garden salad... but sliced over your ham sammich ain't gonna happen!.

So you get a head start from my mistakes - first things first, don't trust the picture!  Some companies (like Burpee for instance) give an accurate pic of what your fruit might look like, others don't (one thing I will say - Burpee DOES give an accurate picture, but rarely with anything to judge the scale by).  One company I have seeds from (bought at the dollar store) have hand painted representations and no proper name - lucky for me though they produced tasty (though tiny) fruits, and I learned enough since to keep them around - even though I ran out of seeds 2 years ago.

Some tips:

If you want a specific type of tomato, google is your friend - find a picture of one you like and jot down its name. If you want to find accurate representations of tomatoes - pay special attention in cooking shows.. Does Iron Chef have an episode on tomatoes? that would be a rather good resource... Personally I'd go watch the episode on 'Beyond River Cottage'  where Hugh does his tomato fair.  Actually all the River Cottage stuff is good as he goes to great pains to tell you about different produce and the differences between them.

READ THE PACKET! It's probably going to have some useful stuff on there about spacing, planting depth, what months... yes I hear you 'well THANK YOU CAPTAIN OBVIOUS! Seed packets have planting info on it.. whoda thunk it?' but there's some not so obvious bits on there you that can help you, and you don't need to know Latin to work them out - although Quidquid latine dictum, altum videtur.... (whatever is said in latin sounds profound).

Some words to look out for that will help you get what you want, or what to expect from what you get:

Determinate/Indeterminate - not all packet have this info, or may have it listed as 'bush' or 'vine' - and it's relatively important.  Determinate/Bush plants will grow, and over a 2 week period will flower, fruit, and then die.  All their fruits will come at that one period - now that's not a bad thing, and could be incorporated into a useful planting strategy for power-growing, but if you don't know it, it could leave you scratching your head about your dead plants.
IMPORTANT: Do not de-sucker determinate plants! As they don't vine you'll be substantially decreasing your yield.

Indeterminate/Vine plants will continue to branch out and spread - they will fruit as long as weather and season permits and die off in the frost.  The majority of varieties sold from seed seem to be indeterminate, if in doubt - Google is your friend.

In a name or brand name there is some interesting info to be gathered:

Heirloom - Wikipedia gives a very in depth discussion on what this means. But an oversimplification would be to say it is an older seed, unchanged and unmodified - thus could be called 'Organic' by todays description. As it applies to my plans - it means that the plant will give seed that I can harvest and reproduce with similar result.

Organic - A big buzzword the last 20 years, you all know it.  The anti GMO crowd will probably keep an eye out for this on the packaging - for me, again, seedwise it means I can probably harvest and replant with confidence of getting a similar result.

Hybrid.   This is a cross between varieties for some kind of beneficial trait.  This doesn't mean that it's automatically some big bad frankenplant that's going to sell your soul to Mosanto, just that it's a cross breed.  It's importance in my world?  That like many hybrid plants the seed it gives has no guarantee of producing a like plant - For instance hybridization is quite common in apples, the seed of your Red Delicious has an greater chance, if planted, of delivering a Sour FuckAwful than anything resembling what you ate.  In the case of tomatoes in my garden - this means I can should only propagate more plants by cloning (yep - we're going to get into that later!... spoiler:  if you're expecting a science lab with a cool tesla coil and jars of bubbling stuff... you're in for a pretty big let down).

Taking photos at dusk... not recommended.
So lets put some of this into a practical example.  The 3 plants that sometimes peek into the background of my container pics are planted from Burpee's 'Queen of Hearts Hybrid' seeds. I got them because the packet said 'Ideal for Slicing'.
The back of the pack tells me the usual 1/4 inch depth and a spacing of 3ft between plants - so for the Siggy Square Foot Gardening method, this tells me 'separate planter' as putting 3 ft between plants means putting at least a blank square in all directions - which is a total waste of garden real estate.
The planting guide says 'March to May' - 'July to August' for my general area (being on the cusp of Florida - the deep deep south), so if they do well in spring I can ante-up again provided I have seeds left (and I have some... not many).
The pack also announces that it's organic, with a USDA Organic stamp on it as well.  It also tells me to plant in full sun, and expect 76 days till maturity.
 On the front or back is no mention of 'bush/vine, determinate/indeterminate'.

A check on Burpee's website turns up nada.. apparently they don't stock them anymore... so not only do I not have the information, but if I happen to like these - I have to make my more on my own - this is where the determination of the plant becomes important:

 Lets review:  It's saying Hybrid - so a mix of plants by some means - that might not give me the same results on a seed level.  The USDA organic stamp tells me that it's not 'a genetically modified organism', so it's hybridization was done by breeding. Now the USDA stamp also tells me that they have to keep records on the plant and it's production, so I *COULD* request information on if this is a 'stable' hybrid.... but even if they decided to give me that info, it could be too late.
I could clone the plant - but if it's determinate, that won't work (it won't outlive it's parent - like a Viking of lore, the skein of it's life was woven long ago....... on the upside if the cat gets it it will enter plant Valhalla).  In this case, where 'hybrid' is at odds with 'organic' by my oversimplified earlier explanation - it's obvious that you'd err on the side of 'hybrid'.

So - off to our friend Google.  After a couple of minutes we get the following info:

Maturity midseason
Growth habit indet.
Leaf type regular
Fruit color red
Fruit shape oblate
Fruit size medium
Fruit type slicer
Variety type open-pollinated
Country England

So, although dicey if we we can pull seed, we CAN clone them.  I can produce as many plants as I like from these - and if need be keep one indoors and keep till July - cloning it back into the garden with a head start on that season.  I can (and will) also keep one Tomato for seeds and compare results with this springs produce.

General Planting

When I plant tomatoes I usually try and take advantage of a couple of their more interesting traits.  Firstly they are very easy to transplant.  I rarely lose one when I do, so I'm not afraid to pop three or so seeds into a hole - if they all pop up I can pluck those out and put them into another container,.  I usually plant them in a rather small pot first - or any other available container (tin can, kool aid cannister, whatever) and I also plant them outside.  For my climate it works well and has me avoiding the whole 'hardening off' process (and safely away from their feline nemesis).
Once grown out and healthy (several healthy leaves), I'll transplant them to their larger pot.  When transplanting, sink the plant low into the ground to take care of another trait 'adventurous roots' - the tomato can sprout roots from anywhere on it's stem (they appear as little white bumps) - vines left to grow rampant will bend and touch the ground, re-rooting as they go.  Take advantage of this by planting them deep so they develop a large and healthy root ball.
A more advanced method is to lay the plant on it's side and bury most of it as you turn the plant around in a coil, maximizing the amount of roots you'll develop.

Suckering

Ima git u sukah!
A sucker is a small shoot that, unlike a leaf, will grow out and be able to produce flowers/fruit.  On an indeterminate plant (vine) this sucker can grow into an entirely new offshoot vine - producing suckers of it's own (and eventually growing into a massive huge tangle).  On a determinate plant, simply more flowers and fruits.
Opinion is varied on suckers - some people strip them all off, others let them grow free or cage the plants up and let them grow dense. On a determinate plant suckers should be left alone - as they don't vine, but rather grow in a bush, pulling off suckers will diminish your crop yield.
For me, it's all about what's being grown - on larger tomatos it makes sense to sucker them - to allow the plant to put all it's available energy and resources into growing those fruits - for cherry tomatoes though, more vine means more flowers/fruits - so I let them grow as they will.
As you can see in the photo, they're easily distinguished from leaves - and only grow from the junction of a leaf and a stem. A leaf grows out and goes 'leafy' on a single stalk - a sucker branches out. I like to think of suckers as growing out of a leafs 'armpit' - once you keep that in mind they're easy to spot.  If in doubt - wait and watch, and a sucker will soon make itself known.  Now some folks will throw them away - but for me I take advantage of what was said earlier, about adventurous roots (the ability of the plant to grow roots from any part of its stem) - now as the sucker will grow into a complete vine - I use this to clone the plant.

Cloning

Wow! Here's the cool sci fi stuff!  Sorry.. gonna be a let down.

Here's the sucker plucked off the plant - they practically fall off in your fingers, like they WANT to be taken off.
Side note: those small pots off to the side are cherry toms from the mystery cherry tom plant. These ones were from a fallen cherry tomato that got buried by accident in one of my overflow pots - all the seeds from that fruit sprouted into a dense pack of plants that are still alive in the overflow container (doing better than these little potted ones too I might add).
Anyways you take your sucker and you....
.....put it in a pot.

Keep it well watered for the next few days and give it plenty of sun. It's going to wilt and fall over during the day - just give it some water when it's in the shade and it will pop back again during the evening. In a week or so it's roots establish and it's off and running. Let it grow to a half decent size then transplant into a larger pot.

It's as simple as that.


If you were after something more sci-fi though, tune in later for.....

THE ATTACK OF TOMORROWS DINNER! (IN 3D!)

(no it's not the alien from the end of the Watchmen comic book - it's just kale...)


Wednesday, May 22, 2013

Harvest Time, Late Post for May 20th

Last week was BUSY!  Between the kids and a couple of days at the farm, I found myself on Sunday dead tired and a million and one things to catch up on.  Had I posted on Sunday this would have been a different post I'm sure. For one I was going to be opening out on it being the first time since September that I had to use house water, but as fate would have it - when I finally got to the point where I could do Sunday's harvest a thunderstorm hit - literally as I put shears to plants. The garden watered, my 50 gallon rain tub refilled, and not having to water for 2-3 days.

Sometimes it's good to have the reins taken from you - well me. I can fall into a system of order very easily, and nature doesn't work that way. Also (although some won't admit it) you end up very invested in plants you've been raising - especially if you've been fighting to get them going. Having most of a week taken from you and letting nature do it's thing can be good. Plants that have passed their season will fade away and you can push forward, rather than trying to bend natures will to your own stubborn pride.

So on we go, this was harvested Monday (and all pictures were taken Monday) but it's now Wednesday night and I'm getting around to posting it all.

Not too shabby
Again a great turnout for beans and peas - more peas this time, and less beans. The differences are negligible and the quality remains the same.
The beans are sorting themselves out in terms of timing. These are were blooms and small beans last week - and in turn the next group will be ready next week.  The only question that needs be answered is will the first batch follow this rotation with more blooms, or will it be more effective to replant.  Either way another 2 squares would put me quite flush with beans, and certainly further along the way of working out the logistics of a full veg intake over spring.
Peas are producing but they are way too big for their trellis. I had to train them back over.  If they bounce back and keep blooming it will be great - My Autumn peas continued till the spring, If I get to the start of summer I'll be happy.
Radishes I continue to thin one of the squares out and keep only one planted full.  I think this is a good strategy and I'll try and adhere to that next spring.  Swiss chard I pulled out. After the week break I could see it wasn't growing at any rate anymore while other plants (such as Kale and my Greens) were going gangbusters.  Time to pull it and eat what you can.

Now THEMS some greens!
 The growth that convinced me to pull things and move on was the greens. They are going great.  I count them and the Kale as 'in the harvest' but I will pull them when I use them (this week).  Like Lettuce I prefer to keep them in the ground till needed.  As for 'moving on' there's a small Kale in the center right square - replanted where I had Beets.  Nature did her thing and told me 'it's over for them' - all 16 were only the size of small seedlings, and I planted them before the carrots - at the same time as the greens.  Be it the wrong place in the garden to plant them, I missed the opportunity, they are gone.  The 13 in the square next to them are shaded - and seem to want to keep growing so I'll keep an eye on them.
Lettuce is starting to sprout in both the bed and the containers - so I might do some catch up on that yet.  Spinach has been replacing the Chard. The hot swing of weather sprouted them all then fried half of them.. Some insects have been nomming as well. Replanted them out and we'll see on Sunday.


This plant has doubled in size since this photo on Monday.
 Squash are starting to flower - I was concerned about the size of the plants (leaves vs flowers), but they have grown larger since Monday. I'll soon be spacing the pots further from each other.  I'm crossing my fingers that this might be the best way to grow larger plants in limited space.
The herb garden is producing very well - especially the basil and parsley. The sage is playing catch up, and all the seeds for Basil and Sage have sprouted out. Garlic is doing well up the back.  Thyme - I guess it doesn't like transplanting that much! I've thrown a few more seeds there.  Dill is coming along, but the same fate that held the Spinach also hit the Cilantro. 2 of the four plants were lost. Still I replanted and moved on.
Rosemary, as predicted, failed to make an appearance.  I used to suffer that with Parsley - no matter what I did it wouldn't grow. Ill be making it my project later this year to crack the rosemary code (without buying seedlings).

Still between here and the containers I have fresh Basil, Thyme, and Parsley to cook with fresh from the garden. If I can build a surplus I'll dry some out to store for later in the year.


In other news, having a week hands off the worm farm, I could objectively see a change in the levels of the trays, as well as a change in the color of the 'tea' that runs off them - slowly darkening again. It's not there yet, but it's on the way.  If I get another 30 bucks to throw at the worm farm I'm very tempted to purchase more of the European Red's - you get half as many, but they are more than twice the size - and they seem to be making a difference (or alternatively I could just let them breed out in that tower and have a more objective look at their performance).  Thus far the overabundance of paper goods doesn't seem to have slowed them down.

My flirtation with Eggplant has yielded 3 seedlings that seem to be doing well. One is in a container of it's own, the other 2 are in one of the overflow containers and have transplanted well. As space becomes available I'll be putting them into the garden proper.  I need another bed!  Oh well - that can be a Summer/Autumn project.

The composting frame, once again, had it's level sink below the halfway point - back to the same level as my pre-mow entry last week. Considering I put 4 boxes of shredded paper goods and all the yard clippings in there, this is becoming a great asset till the worms get back up to speed.  By the end of this week I'd have had to mow again (if the intermittent rain ceases for 24 hours) and another 4 boxes will be added, taking it back to the 1/2 full mark once more.

Spring marches on - I look forward to getting even more out of the garden before this week is ended!


Monday, May 13, 2013

You Say Potato and I Say.....

I say the same damn thing actually. Even with an Australian accent we both pronounce the word EXACTLY the same - I could excuse it if it was patata and it was being sung to a Spaniard - but it's not. That song is so retarded.

Anyways - Spuds.  The most prolific of tubers - the staple that drove history. From it's humble roots in Peru 10,000 years ago to our plates today. Enabling the colonization of Europe and driving Ireland from famine to feast....and back to famine again. There are as more varieties than there are womens shoes.... And yet 90% of us grab a bag of russets from the supermarket and call it a day.  MAYBE if you're lucky some reds or yukon golds.  It's shameful.
This is going to be a long post covering several methods and variations on growing them - a product review - and even a rather paltry handful of the real deal.  New potatoes... that delicacy that growing your own gives you access to.

Firstly - why russets? They're not the best spud, most tasty, nor the easiest to grow. In fact in Peru traditional farmers have a variety of potato for every climate, elevation, soil type, and variety of sun/shade. Yet here in the US, if you're at a supermarket you get maybe 3 varieties if you're lucky.  The answer is McDonalds.  Well I shouldn't point directly at them, it's fast food in general, but since they have their 'iconic fries' (which for the record I think have as much taste as cardboard) they can be the focus.  It's all about economy and uniformity.  Research (yes they actually did a study) shows that you can get the most number of fries from a russet potato, and they want a uniform experience across their franchise. I kid you not.  McDonalds alone holds a massive share of the potato market - so with 90% of the US's growers growing russet burbank's - that's what you get.

So let's grow our own!  It's actually not the hardest of plant to grow, though it has a few needs that should be looked after and a few considerations.  A fertile loamy soil is preferred, if you have too much time on your hands a PH level of around 6.5 is preferred. In the useless fact department, that's about the PH of your morning pee.  For the record I'm NOT saying pee in your spuds.. it's a useless fact that has nothing to do with the garden.  You want to keep the soil damp with deep watering to get all the roots - but not wet - as that promotes rot.

You'll want to buy seed potatoes - no big deal and easy to get at Lowes or Walmart, or for more exotics, I'd look online... ironically I'm doing my tests and experiments with russets (yes - after my huge screed at the beginning, that's what I'm using... next year I won't be.)

There are as many ways to grow potatoes as there are potatoes (ok, not really - but there's a LOT) - I'm going to be dealing with a variation on one of those methods as a way to satisfy the needs of my particular garden.

Image from 'the modern victory garden' - an excellent blog.
The most common method is the ditch or trench method. You dig a trench around 12 inches deep (or deeper), put down your seeder potatoes and just cover them over with 3 inches of soil. As the potatoes sprout and grow, you put dirt up around the stem. the submerged stem turns to root and puts out more spuds.  Contrary to what you might first think, potatoes don't grow 'down' but put out buds and new potatoes between the seed and the above ground stem. You continue covering the growing stem till your trench is full (or even a heaped hill) - the key is to promote the growth of the spuds while keeping them covered - this is IMPORTANT. Non covered they'll turn green and are poisonous.

In the most common of grow-harvest situations they'll flower, then the plants will die off, then you harvest your potatoes and clean, cook, store as you see fit.  When I get around to storing them, you'll have my opinions on methods - till then it's out of the scope of this post.

So we want the most we can get, in the smallest amount of space - and if you're me... the least amount of work. Not because I'm lazy, but because if I have to spend a week away from the garden at harvest time, or get bogged down in housework, repair and renovation projects, and the kids - I can't afford a 'hands on' approach.

The first place I looked was Square Foot Gardening and it's associated forums. Here we're told to build an extra frame to add to the height of the square - then pile on soil (as a SFG bed is only 6 inches deep and we need twice that at least.).
So building a special 1 foot frame per square I want to grow in isn't THAT much of a pain in the arse, but it's work and materials I'll have to source.  Add to this that I know something from personal experience that they might not have hit upon. My mothers garden - the one that inspired me so in the beginning, showed me how rampant they can grow unchecked. My mother had them grow everywhere in the garden. She only ever planted once but was pulling them out for 2 years from all corners of her single monolithic garden bed.  I'm putting them with strawberries and mint - things I'll never plant in a communal bed, but only in a dedicated - separate area or container.
Sorry SFG... not going to happen.

So a variation is 'the tower'. Here take we the covering of the growing stem and we leverage it using vertical space to maximize the yield.  I ran across an article on this originally with a retired potato farmer, who reported growing up to 50 - 100lbs of potatoes on his condo balcony.
'Sounds legit' as we internet smartarses like to say (with our tongue firmly in our cheek).  This method I did try personally in garden #2, and the idea works - but isn't without hidden pitfalls.  But first - the method:
A 2ft by 2ft frame is constructed out of 6inch wide lumber (I used 2x6's) and corner posts are put in reaching up to 4ft.  You plant your seeders in the box and cover with 3 inches of soil, then as they sprout you cover them. When you reach the top of the box, you screw on a new set of planks and fill some more.. rinse and repeat till it the tower is complete.  The plants then grow, flower, and you can...in theory... unscrew boards and rob new potatoes from within the tower without harvesting, or leave it till the plants die and you harvest the lot.
I did this myself, but had to move house before getting a harvest in. I had to dig out and dismantle the box.  I did indeed have roots that went up 4ft and lots and lots of buds that would have grown into potatoes (including a few fully formed new potatoes).  So it DOES work.....
.
...HOWEVER... here are the negative points.

  • Empirical evidence of people not getting that high yield. Probably user error, but with more reports of a low yield than the estimated 50-100lbs, it tells me this is needs a bit more babysitting than people are letting on. The checking of plants and topping up is work enough - I need a more hands off approach.
  • Not all potato varieties will grow that tall and sprout potatoes all the way up. People growing Yukon Golds, for instance, reported very low yields only in the bottom of the tower - the rest was empty.
  • The sheer amount of soil. 2 x 2 x 4  is more dirt than you think it is.  Unless my math fails me, that's 16 cubic feet of dirt. My square foot gardens at 6 inches high are 8 cubic feet. So I could fill 2 complete new garden beds with this soil.... which leads us too.....
  • Old School Farmers advice not to grow them repeatedly in the same soil - untested and unverified, but I take advice from the senior generation seriously. Disposing of this dirt, even if it's into my garden beds for a couple of harvests, means I need 2 garden beds to swap soil in and out of to effectively rotate the soil. That means all plants emptied at the same time - dug out - swapped - refilled and planted. This is the opposite of what I'm trying to achieve: constant planting and rotation within the squares of each bed.
  • Cost to gain. getting THAT much dirt and compost as well as the materials for the tower, even with my frugal sensibilities, adds up. You not only need a maximum gain, but be able to reuse it several seasons to get a 'pay back' in savings.
  • Deep watering. Potatoes need deep watering - you need to ensure a method to get that water all the way down into the tower when constructing it - although I managed with a long - slow water - it's not mentioned in a lot of how-to's and articles and could lead to a small yeild.
So - if you're game to try, go ahead. This method DOES work and I wouldn't dismiss it entirely if it suits your situation. My cons are strictly for the BMG.  So we must look further.


During my Mothers visit to the US earlier this year we were discussing her prolific potatoes in her 70's garden (yes I'm THAT old), my current gardening methods, and her own situation and returning to her gardening.  While on a shopping trip at WalMart we found the grow bags she'd had limited success with, but also the TaterPot (I'm including the manufacturers link as they also deal with online seed potatoes... see how good I am to you guys?).  It's a nested pot that allows you to grow using the methods I've detailed above, it includes everything you need including sphagnum moss as it's growing medium and 3 seeder potatoes of different varieties.  It cost us 12 bucks at WalMart - or 14 bucks on their website (I must have hit a special).  If you wanted to get one thing and grow potatoes - it will do the trick.
 Here's mine. Growing away a bit over 2 months.
The only things I've added to their instructions is to dust over the leaves with some worm tea, as I do for all my plants, once a week for pest control. As far as watering goes it gets the same as all the other plants. Some worm tea in water, and the addition of extra water to ensure it's always damp.

Here you can see, as advertised , new potatoes in the accessible inner pot.  I'd feel comfortable telling people wanting to buy it works, exactly as they say.
So - a solution to my spud growing?  Not yet, although I felt comfortable spending money to test it out - There's still the price. $12.  If you're a casual gardener doing this for a hobby, it's no big deal.  If you're doing things similar to me, as a garden that pays its own way, you have to break it down into how much it produces. I'm pretty sure I'm not going to get $12 of potatoes out of it in one harvest, so it's going to come down to how reusable the system is, and how easily it is to reproduce the results replenishing the medium or substituting it.

After we bought this, for shits n giggles I rummaged around the workshop for some supplies I knew I had, and an idea I wanted to try.  You've probably seen this off to one side in a few of the garden pictures, I present my 'ghetto fabulous' alternative:


It's a plastic milk crate organizer, lined with landscaping fabric. I planted 3 seeder potatoes on  3 inches of my own 'potato mix' soil and covered it over with another 3 inches.
I set it up so I planted them literally one after the other to set up in a head to head test.  They've had the same watering, the same treatment over the same period of time. I went today to check the harvestability of them and see where I stood after 2 and a half months.
This test isn't 100% scientific as I moved the milk crate over to the squashes. They get roughly the same amount of sun, but I should have put them side by side.  The milk crate has 3 seeder russet potatoes in it - the tater pot has a yukon gold, a russet, and a red.

First - although the milk crate cost me nothing as I had all the materials on hand, I could break down the costs roughly.
  • The seeder potatoes (of which I have many left over) were two dollars.  The crate was on special when I bought it for two dollars fifty (although there are dubious means of acquiring ACTUAL milk crates - as we all did as bachelors or students.. I'm not endorsing them on the site... but if it's free, it's me).
  •   Landscaping cloth I pick up for 3 dollars a roll, but I always have some on hand - as should anyone gardening or landscaping.. I'm not adding that in.
  •   The potato mix was 1/2 cow compost (2 dollars a bag - I used under a quarter bag, lets call it 50c) and 1/2 coconut coir (3/4 an expanded block - at 1.50 a block - lets call it 1.50).
  • And several handfuls of fresh worm castings (free).
  I *may* have put in a handful of perlite, but I can't remember and I couldn't see it in the mix.

So a total of  $7.50, provided you have the materials on hand,  If you had to buy the cloth, the compost and the coir.... $13.50... a dollar fifty more than the tater pot.

Now side by side the TaterPot seems to have more green happening, but the proof is what's under the ground.

 The milk crate - the soil was made to be loose and non-compacting. Using a method we call 'bandicooting', the soil is moistened and you slowly put your hand through the soil and pluck out the potatoes while trying not to upset the roots too much.  We'll have to see how this went over the next few days - but these were the easily grabbable spuds.  The near lack of skin was pretty cool... these won't have to be peeled.
I also saw a LOT of buds that hadn't grown out yet - leaving me with little doubt that left alone till a full harvest, from start to finish, I feel very secure in saying I'd have a milk crate teeming with spuds.

The prize catch was this monster. Remember I'm a rather big guy, my hand measures 8 1/2 inches from the tip of my middle finger to the base of my palm.
And you know what they say about big hands...... that's right... big gloves.
 The setup of the TaterPot really only allows stealing from the edges of the inner pot that are exposed - I didn't want to dig into the soil too much to disturb other potatoes, as what you scratch will probably rot. This was evident when a pecan fell out the side that a squirrel had buried and alongside it was a rotten russet potato of a half decent size - not comparable to the one above, but it would have put them on a more equal ground.
Together we can see the results. That monster spud tips the scale. But remember this isn't a 100% objective test. There are probably still spuds in the center of the TaterPot.  The one I lost might have put them neck and neck - but then again this is a test for how many I could get RIGHT NOW, so I have to give it to the milk crate.
Now these results are not final. Plant recovery WILL be taken into account, and if my russets don't bounce back from my manhandling - it will be a decisive victory to the TaterPot (due to ease of early harvesting).  I look forward to starting them both again and seeing the reusability of the TaterPot as well as it's usability with other mediums.
If I had to set up again tomorrow, I'd use the milk crate - but that's mainly because I can do that without purchasing anything - if I had no materials I wouldn't be adverse to buying 2 TaterPots.

Now a garden is only of use to anyone if you find a use for what you grow... And if you don't use fresh produce while it's fresh.... then what's the point?  Had I a few more I would have done mashed spuds - as there's really nothing greater to showcase how delicious a new potato can be. But wish in one hand and shit in the other - see which fills first.  What did we do?

tell me that doesn't look good!
A pot roast - with the exception of a single onion and the meat - it all came fresh from the garden.  I still have some peas and some beans left in the fridge for tomorrow.

....now all I have to do is get that to happen the other 6 days of the week.....


Composting - A reason to look forward to yard work.

I'd been trying to get around to mowing up the yard all week, but things have been getting in the way.  It doesn't look TOO bad I know - just a few weedy flowers poking around - but with little kids that love to poke and prod things - and it being the season for fire ants to start showing up (as well as other things like snakes) - I like to keep the yard well trimmed.
Once it might have been a chore - or as a kid even a punishment, but now I actually look forward to yard work, raking, and sweeping - because it's all compost.  This years crap is next years soil.
I started composting in earnest with Garden #2 due to the incredible amounts of kudzu and other unwanted vines. It was a constant battle between a garden and a jungle.  Combined with the incredible amount of paper goods you end up accumulating with 2 small kids - I started what seemed at the time a 'mini landfill'.  It was one of the successful things to come out of that garden - with a turnover of 4-5 months per pile. I hoped to tweak those methods when I got a yard of my very own to do with as I please.


This is a 4 cubic foot composting frame I put together in April - On my birthday actually. I wanted a day to myself to get some projects done that I got to choose, of no particular priority. This was one I knocked out in a few hours.
A simple frame glued and screwed together with cheap strip timber, lined with landscaping fabric and floored with some plastic chicken wire.
The size came from previous compost cages I did, where I experimented with the size - only to corroborated later with online research.
4 cubic feet seems to be the acknowledged ideal lower end of effective composting. It's all kept neat and away from the kids, and simple so I can work out how to harvest that compost later.  I can cut out the bottom of the cloth and put a hatch in there, or sheath it in plywood if the cloth is too flimsy - so far it's held up.  Composting is a long term plan. I've had a full compost area turn over in as little as 4 months, and others (smaller) taking a year. So it's to supplement the worm bins, which are still front and center in the garden plan.
I try and keep to the same plans as my worm bins too so far as what I put in, and how much I put in.  When I have a huge cardboard box, like a swimming pool or a TV, an AC unit - where it would be a month of Sundays to break down and bed the worms, it goes in here. Also surplus shredded bedding from the house (because without really thinking it through - I shredded down all the supplies I used to move house - I have literally a years worth of shredded worm bedding stored in empty diaper boxes).
Instead of coir, we have the leaves that fall from the neighbors trees (and my own magnolia), instead of veg scraps, we have grass clippings.

 I've piling clippings, cardboard and leaves in this since I built it, and although it took next to no time to reach half full, it has remained there. Every time I go to pile stuff in, the level has noticeably dropped.
I was planning on filling it and building a second while this one settled down, but it's now looking like I'll be modifying the design to dig out from the bottom and having it as a flow through.
It's getting eaten away by critters on the top, earthworms coming through the chicken wire on the bottom, and the mass builds up heat in the middle.  These things seem to be adding up to a perfect storm of composting - so much so that I may be forgoing my original idea of tumbling it top to bottom every few weeks when it was full... because it might never get full.

It's good to have as a backup as well - as by ignoring my own guidelines my worm bins are still getting back up to speed due to a lack of green scraps.  So surplus paper scraps have a place to go while I'm sorting that out.
The biggest thing though is the lifestyle change - no longer is this aspect a chore, even though I enjoy my yard time I find myself looking forward to mowing and cleanup as I'm actively working towards my own supply of good soil.

In no time the yard is ready for the kids again - I still haven't worked out a 'fun' angle for moving those wooden shelves and the planter/shed project I put on hold when I moved here off the driveway and tucked away .... but still there'll be no complaints about having the yard ready for the kiddies and the wife, and that's always a priority.
As I tell my friends 'Happy Wife = Happy Life'

Sunday Harvest - Garden and Yard.

Ok, so it's Monday - I ended up doing my gardening in the cool of the evening last night after spending a goodly portion of the day with the kids in the backyard and grilling up some steaks for Mothers day.
With temps rising steadily, it's been a busy week. Out at the farm prepping for the blueberry pick, both by hand and harvester. A couple of 'landscaping' jobs as well out that way. Also the installation of a pool for the kids as a 3rd Birthday present.
This should see them through to learning how to swim, then I'll put in a bigger and more permanent pool for them. I've already claimed this for when it's retired to be put into the aquaponics equipment store.  I'll be prettying up the area a little over the coming weeks - nothing too flash and with supplies I can repurpose at a later date.
This is a pretty common practice for me, as I have many projects of varying importance going on at any given time, and time/money don't always line up when it comes time for personal projects (such as my garden and gardening experiments).  Repurposing and advance buying of equipment goes a long way in making them happen.  When you go to pick up things for one project, get a little extra - 2 more 2x4's - when I do the watering system I'll get some extra fittings - plumbing? grab a couple of extra pipes and fittings if you can.
For a medium/large scale aquaponics project - one of the major expenses will be setting up a decent sized tank.  By the time we retire this as a swimming pool in a couple of years, I should have had ample time to do small scale experiments to dial my ideas in.

This month has been a mix of things going very well and others, not so much. The beans and peas I'd put down as going very well, and some lessons learned to apply later.  The trellis I put behind the peas is around 4 1/2 feet tall. They have exceeded that by a good foot to a foot and a half.  The 2 square feet holding 16 plants (8 on either side) have done quite well. This pic is after the Sunday first harvest. There are still lots of small pods on there - these are Asian Snow Peas, I use smaller pods in salads, so I keep them on the vine and pick them as needed for that - when the peas themselves get big, I'll pick and shell them.
 Not a bad pick for the first off the plants. The picture makes it seem less, but there 's a goodly selection of beans and peas.
After shelling there were about a cup of peas in there and a quart bag stuffed with fresh grean beans.  Enough to include in a meal for 3.
With plenty of beans still growing, and plenty of pea pods yet to fill out - I'm looking forward to seeing how it compares to next week.
It's clear that the logistics of producing EVERYTHING will require more plants, but I'm getting closer.
One of the beans, and not even the largest. It was interesting to continue the comparison between those mulched with worm castings and those that weren't.  The 2 squares that were produced bigger, fuller beans in a greater abundance - a noticeable amount.
The volume I can account for, but the fullness I had to think about - With all fertilizing, watering, and care identical, the answer I believe lies in the water retention qualities of the castings as mulch.  The soil post-mulching can soak up ridiculous amounts of water extremely quickly, and of course mulching in general helps lock that water into the soil and help keep it there rather than evaporating.   With the only other variable involved being the April/May rains we get here - I'm thinking those squares lock in the moisture much better - which gives more moisture it can pass onto the beans.  Anyways - that's my theory. If these numbers hold, I think next planting will be another 2 squares of snow peas or snap peas, a 6ft trellis, and 2 rows (8 squares) of beans - and stick to my mulching as soon as the beans hit their second leaves.  Hopefully by next planting my worm bins will be back to full production.

Radishes (bottom row between the carrots) I've been thinning down and not replacing.  2 squares of 16 has done pretty well with a nice spacing between maturity - that being said I have 2 quart sized bags of radishes in my fridge at the moment - and not much saladwise to go with them. I'll be replanting one of the squares when it empties.  Beets went up with a promising start, although they've been less than stellar since then. I think a combination of heat and watering are giving me less that great results.  I'm going to cut down their water by only watering them every 2nd water-day.  Hopefully this will promote better root growth (if they don't die).. In the back - turnip greens are getting bigger and bigger. My wife has to brush up on greens prep over the next week or so as I'll pull 2 squares and cook them on the night.  Replacements in those squares is undecided.

That about covers the Sunday harvest.  Spring is still early and I'll be looking into some of the shortcomings in the garden in another post.

Monday, May 6, 2013

Vermicomposting (worm farming) - Common Problems.

Although it's a relatively simple process - turning junk mail and garden scraps into fine compost and fertilizer, it's not without it's pitfalls. The internet, with as much information as it gives you access to, is also rife with misinformation.
Sometimes this misinformation compounds, and just because many people search for a solution, doesn't always mean the most found answer is the right one - I'll be giving one such case later.
Here, on this blog, I'm only going to give answers to problems I've solved personally.  And if I ever accidentally give some misinformation, feel free to discuss and post your own experiences.

In past posts I keep talking about the bin as an environment - a point I want people to keep in mind especially in this post.  You're trying to create the best possible conditions for the worms to do their job and for scraps to break down as efficiently as possible. So lets review what that is:

  • Worms like a moist environment - they breathe through their skin.
  • Worms like dark places - so the bin should be opaque.
  • Worms don't like an acidic environment - even though the process that creates their food also creates acidity.
  • Food and bedding should end up around a half half of brown to green scraps.
  • Worms breathe air, so the bin should be well ventilated. 
Keeping these points in mind, it's not that hard to troubleshoot most problems - so we'll go over the more common ones.  Nearly all problems I've felt are caused by and solved by either moisture, food, and bedding.

My Worm Bin Smells

A well run bin shouldn't smell with the lid on. It should hardly smell with the lid off, and at most should have the same smell as soil - even this shouldn't be noticable from more than a foot or so away.
Even that small scent of the bin can change depending on what you've fed them. When I fed mine a chopped up melon that we couldn't finish there was a sweet smell to it - recently when I've had a high amount of paper - there was a musty smell to it.  But these are such that you have to have the lid off and actively have your face over it and smell.  This isn't the smell that's a problem.

Bad smells, and strong smells from the tub are caused by too much food. As scraps break down the worms feed off the microorganisms causing that. Too much food, it breaks down, the worms can't eat it up enough to keep up with the breakdown - and you have the smells that are associated with that stuff breaking down by itself... makes sense doesn't it?

The Solution:  Simple - don't feed them till they can catch up.  I'll also put a bit more bedding down on top - it can filtrate the smell a bit and also head off other problems that can come from too much food.  Leave them be for a few days, check for the smell, if it's back to normal - check the food by lifting up the bedding - if it looks like they're doing their job - go back to your feed schedule - if not, leave for a few more days - repeat till fixed.  Worms will be attracted to the food, and they adjust their population to the amount of food - so they will eventually solve this problem if left alone.

I Have Flies In My Bin

Be it normal flies, or more commonly little gnat like flies (fruit flies/vinegar flies) circling around... I call them 'funk flies' because they remind me of the spots they put around people and things in cartoons to denote something funky smelling... anyways - if you had the smell, you might also have the flies.... and the problem is one and the same - too much food.  When things break down and sit around, other things can come to the party. Luckily the environment we've created for them doesn't attract a wide range of critters - but flies are one that will come, like mico vultures coming to the feast.
The solution is also pretty much the same - don't feed them.. with the addition of adding more bedding.  The flies can only eat what they can get to - so adding more bedding means they can't get to the food, so they bugger off.  My own personal solution to rid yourself of them in under 24 hours is putting a thin layer of coconut coir over the top and wetting it down - it makes an effective barrier that the flies can't get to - and problem solved.

DO NOT use pesticides in your worm bin - no brainer, but I have to mention it.


There Are Lots Of Little White Insects In My Bin!

This is the one that I've seen the most freakout posts about on the web. When I mentioned information on the web, this was the one I was referring to. Lots of little white bugs hopping around in the top of your bin.  I saw them called lots of things from mites to white flies, to white fleas to dust mites.. I read of people cleaning out thier bins and dousing them with pesticides or sterilizing them and starting over with new bedding, sometimes new worms - and always these things returned!
Whats worse is others followed these peoples advice blindly, when a little more research would have told them exactly what they were dealing with.
Have you seen these guys?

The culprit looks like this from a distance - when disturbed they jump and scurry around on the top of the worm bed.  I have to admit I was a little unsettled, and searched the web for a solution to what seemed like a worm bin infestation.


What you're looking at isn't a mite, or a flea, it's a hexapod currently referred to as the 'springtail' - to be more specific - the soil springtail.

It is possibly the most populous creature on earth. Up to 100,000 populate every cubic yard of active topsoil on the planet.

They cannot live in topsoils that have toxic elements, nor can they live in dry conditions - they prefer a moist environment and their primary food source is the breaking down of leaves and other plant material.

Although some very specific breeds are noted as an agricultural pest -  the common soil springtail is used in tests to study soil toxicity.  They are not harmful to people, animals, or plants.

So - sit and think on that a bit.  We have people cleaning out, sterilizing, spraying, washing with pine-sol and other chemicals, to get rid of a creature that not only lives in the exact same environment as our worms - in fact loves the exact same conditions - eats the same food - and can only live in soils that are not toxic (ie. healthy).  They can't survive outside of the bin, as it's too dry, and they aren't harmful to you or anything in your house.  Kinda like your worms actually.

Springtails shouldn't be a sign of doing something WRONG, they're a sign of doing something RIGHT.   Good healthy non-toxic material in a moist environment.  What do I do about them?

Absolutely nothing.

Some put forward the argument of 'competing for food', which I say 'bollocks' to.  Nearly all the problems we find in a worm bin with feed deal with overfeeding or ratio of feed - and the rate we feed our bins mean the springtail has no impact at all -  if anything it's going to be a benefit in eating up excess food - even so they are no match for the mighty compost worm, who eats up to it's own weight in a day - if anything the worms would starve out the springtails.  They regulate their own population as well, and live side by side in the worm bin environment.

Other Critters

There are other critters that can live in a worm bin - actual mites I've seen photos of in a bin - but as I haven't had them, I'm not going to comment on do's and don'ts of the situation. You'll have to do that one for yourself - just remember to always research more than one source, and if possible a proper scientific study.  Academia trumps internet speculation every time - and always remember your worm bin is not a dog house - it's an environment for breaking down compost.
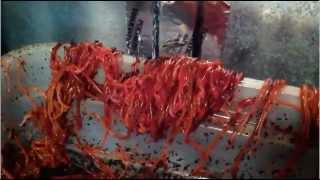

Worms Are Escaping!


Hopefully not like this - I love that picture, and no it's not one of mine.  I've not had anything like that happen to me, but it could happen to anyone.
There really isn't much keeping a worm in worm bin, not even in a store bought one. I have thin fabric mesh on top and bottom, and even THAT isn't a guarantee of keeping them in 100% of the time.
So the only thing keeping them in is them wanting to be there - if we follow that thought it doesn't take a genius to realize if they want to get out - there's something rotten in the state of Denmark (to quote the bard).

So, to trouble shoot.. lets look at the bin. Is the bedding dry? Worms don't like dry. If so - water it down with your prefered method.

Ok so it's not dry - is it too wet? That one's a little harder to detect. Wet is good but too wet can be a problem. To be sure if your worm bin has a drainage spigot, turn it on - if lots of water comes out, you've found the problem. drain off the excess and go fertilize some plants with it.
I get worms going to the top of the bin sometimes when I water down on a Wednesday and Sunday.  I've taken to opening the spigots periodically for a couple of hours afterwards.  This gets any initial excess out and avoids the problem.

Take a sniff.. does it smell bad?  Too much food - follow the directions under that problem.

Doesn't smell BAD, but smells a little sour?  The breakdown of foods is making the environment a bit acidic - cut back on food, add eggshells, fluff them into the top of the bedding, add more bedding and make sure it's all nice and moist.
This problem won't solve instantly - but should right itself over a short period of time as the new bedding you add and mixing the bed up will disperse that a little, and the eggshells due to the magic of calcium carbonite (which only dissolves in acidic environments) will buffer your PH back to neutral.

Are they getting good ventilation?  If you keep them in a closet - leave them out for a day and observe - maybe the air in there is a little stale.  I keep mine next to a duct register on the floor - cool in summer and warm in winter, and plenty of fresh air.  I should note this is also in my workshop, so if I ever encounter 'the slithering mass from the drive in theater' the rest of the family doesn't have to deal with it.


Are the worms new?  This is one I can't scientifically back up - but both times I've had new worms they've taken time to settle to their environment.  Maybe they get stressed, maybe it's unfamiliar, who knows... Give them a bit of time to adjust.

Is the bin too full of castings?  You'll know this one just by looking at it.  if all you see is castings - the bin is now too full of them - the worms can't live in their own concentrated poo (I wouldn't want to either) - so its time to add a level to your bin (if you have the tower variety) and add bedding, or it's time to harvest!

And the final thing you should do with ALL these cases:  Worms don't like light. They burrow away from it. So after you've carefully put back any escapees or gently scraped them off the lid of your bin, leave the lid off and a light on.  They'll naturally go back under.

Another trick I do if it happens again - I put some dry bedding on the top. I don't moisten it.  Worms need moisture to breathe, and so they avoid the dry - between the dry and the light - the worms stay down in their home.

How about the temperature? Worms are best around 50-70 degree mark. Most worm farms come with a 'worm thermometer nowadays - but to tell the truth it's just a meat thermometer you'd stick in your chicken - about 3 bucks from any store. Although it's more than likely too hot or too cold will just make your worms slow down, which brings us to........

My Worms Aren't Working!

It's a vague complaint that I've heard - so we have to find out what 'not working' is.  For example my Mother's tub she thought she had no worms, as she didn't see them (even when sifting through some of the bedding) - although she gave them something they didn't like (an abundance of bread) and they all came to the surface quick smart. And after solving the problem of too much food/worms escaping - the question of them working was answered.

Mostly I take this as 'my worms aren't making my compost fast enough' - They're not performing 'as advertised'.  Well firstly you have to realize the 'consumes up to it's own weight' means just that 'up to'.  It could mean from nothing.....up to it's weight.  Also there are worms and there are worms.... there are teeny, tiny, fit 100 under your fingernail, baby worms and there are longer mature worms, and there are even European 'super' worms, a family of composting worms that are much bigger (I recently bought 250 of them, and I'm rather impressed) - up to 2 - 3 times bigger than the red wriggler.... and they'll only ever perform when they're happy... in a nice optimal environment.

Check the temps. As I said above, a meat thermometer can tell you if it's too hot or cold, and that can slow your worms down to dormancy in the cold or hot - or if too hot or too cold, kill them (although the temps for that, you'd be freezing your arse off or sweating it off respectively).

Look to your food mix - half green, half brown.. This isn't a scientific formula, nor is it like baking where you'd measure those ingredients exactly - it's a guideline. But it's THE go too for non productivity in your worm bin.  Too much green food and we see problems at the top of the post - too little or none and things start taking a loooooong time to break down.

I'm experiencing this myself due to my own boneheadedness.  After moving house I found myself in the age old problem of 'look at all this trash from moving!'  Normally I'd have spent 10 months getting rid of it in bits and pieces - because lets face it, I'm not ashamed to say after moving at the best of times I find myself broke as a joke and forking out money to the landfill doesn't outweigh my putting up with cardboard boxes in a corner of a storage room or the workshop... only now... I have worms to eat them!  Of course I grossly underestimated the amount of stuff you accumulate moving a house of 5.   Normally I'm pretty good on the mix, but add to that our deciding to buy a bunch of stuff for the house at the beginning of the year (new TV, toys for the kids, other goodies) and suddenly there's an even BIGGER surplus of paper goods, and our treating ourselves added to a lack of available green scraps... so being a little absent minded at the time - I went about the routine of feeding for a couple of months - with very little veg scraps - I honestly didn't notice at the time.  The output of castings went down a little the first month - and a little more the second month. Last cleanout at the start of this month (I wanted to do an article on the harvest) and I noticed there was so much unfinished paper and cardboard that sorting out the castings would be a waste of time. Usually I have a big container of castings with some unfinished paper in there - this was the opposite.

I've since added more green scraps to all the levels of the bin, but only time will tell if that picks it up, or if my own oversight has set back my casting production for several months (funnily enough - when I wanted it the most).  Goes to show, it doesn't matter how much research you do, or how much knowledge you accumulate - it's no damn good if you don't implement it.  Live and learn - we are the sum total of our mistakes, and you don't learn that much from a blind success.  The only stupid mistake is the one you make twice.


That about wraps up all the problems I can think of - as you can see they all deal with moisture, food, and bedding.. in 99% of cases you can solve any problem in your bin by troubleshooting these 3 things things... Keeping worms IS easy, it's just not totally idiotproof.


Sunday, May 5, 2013

First Veg of Spring - Garden Update

10 days since my last post, and you saw some half decent snaps. I've been rather busy this week with the twins turning 3, getting a few things in the yard squared away so I could work out where to put the replacement for their budget wading pool (15 bucks well spent - but it's time to upgrade), and other household sundries.

So I guess everyone was expecting some HUGE haul of wonderful veg, and have me telling them how it was 'all worth it and easy to do', then go into pickling and storage methods so as not to waste this bumper crop as it we look towards our winter months....

 Well, sorry to disappoint! Technically the first spring 'harvest' it was more 'pick it or lose it'.
I did want to show the colors of them - and the pics don't do them justice (my camera is ballsing up today).
I noticed 2 radishes bolt to seed on Friday - so I'll be pulling these as they poke a little red out of the soil and adding them to the gallon bag near full I already have in the crisper. I was hoping they'd time out with young lettuce - but it wasn't to be.
Radishes will be cleared out and make way for another crop (undecided - I'll see what's in my seed bag - it might be spinach, or something new).
Peas were the first spring buds coming to nice bulging pods. I could lose this first few while waiting for the others to catch up.

As you can see, now in full bloom there is no shortage of peas for next time, but these early buds may harden up waiting, and I didn't feel like baby pods for a salad with no dang lettuce.

 On the subject of that garden bed - it's interesting to look at the beans in front of them and compare them to the other 4 squares on the right next to them (a close up below).  They were planted at the same time, same soil, they get the same sun, watering, fertilizing.

There are only TWO differences between them.
The left hand beans are 2 squares planted in front of the peas (although with the sun on this property - they aren't shaded by them), and the left 4 squares were mulched with worm castings when they came into their 2nd leaves.

These beans weren't mulched. I had some left over from setting up beds and containers and decided to use the surplus to start mulching early - though a small casting harvest this month (which I'll go into in vermicomposting later) has put this on hold for maybe another month.

Even if I don't get to do it with these beans - it shows an objective look at what mulching with castings is capable of.
That being said - consider these plants are less than a month and a half old, that's from planting the seed to now. Although the picture doesn't really pick it up that well - all of these are in flower and with beans, in another week I think I'll be having some worth picking... so all things considered, my liquid worm runnoff fertilizer is no slouch either.

Carrots - about 3/4 the size of my hand - not a bad size to cut up and put in a soup or stew - but when you consider they came out of the container shown to the right (a standard 'window box' plastic garden pot) - it's not bad at all. I doubt they would get any longer - only wider - and as I learned over Autumn, there's a limit on how big you want a container carrot to grow.
Anyways - I want to use this container for other things, so as they mature I'll pull them up.


The herb garden, shown last blog post being planted, is doing good. Basil is growing quite fast  - and the single plant is growing marginally larger than the front 4.  The question will be will it produce four times as much in order to 'break even' - time will tell.
The sage next to it is coming along slowly - but all 5 plants are doing well.  The squares ahead of them have sprouted their basil and sage from seed, as well as cilantro and dill.  All other transplants have done well - chives, parsley, although the thyme is recovering - one of the sprigs didn't quite make it. Thyme being a ground cover - that doesn't give me much concern.  Garlic in the back is peeking up, and the only square not to show me the goods is Rosemary...but Rosemary has a long germination time anyways - so time will tell.  Even if it doesn't - if all the squares bar one is producing fresh herbs it will easily put the entire garden into the black before summer.

I was going to curse out the lettuce again, and was thinking of trying a new variety, when I noticed several very very small plants peeking up from the soil after watering.  The spacing would be right for the lettuce I planted into those containers last post - and so I'm hoping for a positive outcome.  If they pop I should expect between 10 and 12 ready for transplant in about a week and a half.  To fully fill out the squares I need about 14 plants - so if I get a good result I'll keep one container aside to propagate lettuce for the rest of the spring - transplanting to the bed as I pull the others.
This is not a BAD thing all in all, as the spacing between the growing plants SHOULD allow me to pull lettuce as wanted on the day - which always gives you a MUCH better product than harvesting and storing in the fridge.

One of the big things today - though it doesn't LOOK impressive was this little baby. Tucked at the end of the Turnip greens.  It's a pepper plant just starting to flower out. Big Deal.  Well it's the sole survivor from garden #2.  I took 6 pepper plants with me when I moved to the house. 4 survived long enough into that summer for me to plant in the new garden bed - of those 4 this one had some dashes of green at the mulch mark after the break of winter, and it's kin were dry sticks of wood.

So pruned back to an inch above the soil, it's grown above it's old stick of a base and putting forth flowers - whereas the new Peppers are only into their 2nd leaves.  So with any luck - some early peppers.. 'You could just do them indoors and transplant!' I hear you cry - but alas the house cat, while being a very good mouser, has a love for anything green or anything resembling a straw - the only thing that saves my outdoor plantings from the cat is that it only gets out when it manages to escape.  Maybe next year I'll build that little 9ft greenhouse of my dreams... but that's a LOT of outlay, even if I use my mediocre DIY skills.

The Turnip greens are doing rather well (when you look at them from 10 days ago) although I still think on my part that was a boneheaded planting.  Collards would be a good planting for greens alone - but what I SHOULD have planted were Turnips... I could have gotten a 2 for 1 deal on that.
Live and Learn.

All in all a good start for me I feel - with a good idea of some Autumn/Winter crops that work in South Georgia, next year I can start tightening up the gap between the seasons plantings - in a perfect world having an overlap between the last of Winter and first of Spring.