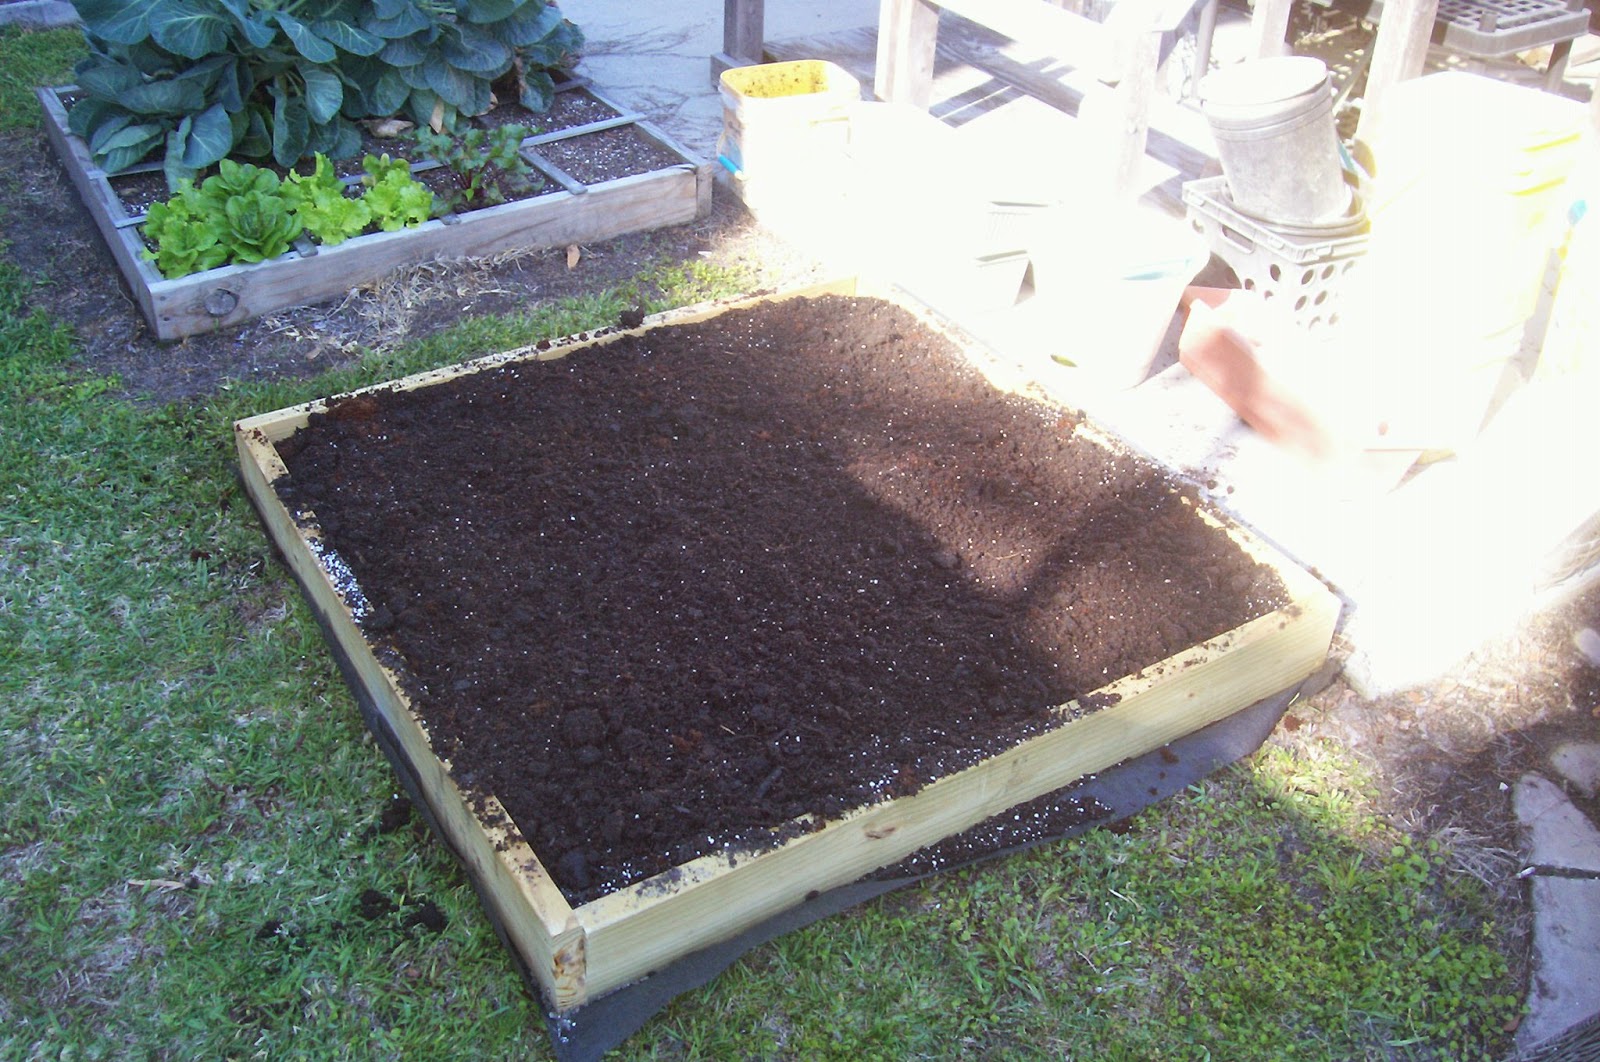
Added another 4x4 garden bed, and figured that since people ask me about it I should document it and pop it up here.
WARNING: This is a walk through for beginners, so don't pester me with 'Captain Obvious'. I'm preempting questions based on my own mess ups, and hoping others don't do the same.
This is nothing special - it's just a 4x4 garden bed as outlined in a zillion and one square foot garden blogs, articles and books. But for what it's worth, I hope this answers questions helps with a lack of info that can bite you in the arse if you do it for yourself.
The big question people ask is 'cost' and the answer is 'depends' - depends on tools you have and want to use, depends on availablility of your lumber, depends on what you fill it with, and filling is the thing you should keep in mind. This particular one, with some careful shopping, cost me under 50 bucks to put together. Your mileage will probably vary.
Supplies:
You're going to need some lumber, people are going to say 'use this, don't use that, only get this' but the truth is : use what you can get your hands on. This is going in the backyard so there's no point spending more than you have to.
The Walls
My last bed was made from my previous garden beds so it cost me nothing - you could use reclaimed wood or whatever.. the only thing you need is 6 inches of width - because your garden bed is 6 inches high. Now when I say 'need' I mean it as 'you won't outgrow this garden bed later' - you could grow just about anything in it. You could use 2x4's and grown only plants with shallow roots, but sooner or later you'll wish you didn't.. so if you can - go 6 inch timber.
Now I bought mine this time - as I'm running behind schedule and didn't have the time to scrounge, also this exterior lumber was on special (there is a reason - and I'll show you a little later..) I paid $3 each for these 2x6x10's. When you buy timber you have to be aware of a few things... a 2x4 or a 2x6 in this case isn't 2 inches wide. and an 8ft long board may not be 8ft long, and even if it is, you can't cut it into two 4 ft lengths anyways.
If you're new to tools and wood, this can bite you in the ass constantly.. you have to be almost paranoid. Stay Alert, Trust No One, Keep Tape Measure Handy!
On our 2 inches wide we don't have to worry - because that's not really important here - our depth of 6 inches - if it's a bit high or a bit low it's not going to make that big a deal either.. BUT that length.. you're paying for that length, and a mistake can be costly. I bought two 10 foot long boards, and here's the reason:
The actual dimensions on the ground (4x4) of the finished bed are pretty important - not 'millimeter accuracy' important - but if each square is 'a foot' - it shouldn't be out by a 1/4 inch, and it should be square - not cabinet maker square - but it's a 'square foot garden' not a 'rhombus foot garden'.
If I buy an 8 foot board, measure 4 feet down, and cut... I'm going to be left with whatever length they gave me (not guarranteed at 8 foot anyways) MINUS the width of my saw blade cut... that can be an 8th of an inch... so that will throw you out by a quarter inch on 2 boards, which depending how you line that up... well.. good luck being square. Rectangle at best.
Not only that, but you're going to have a 4 x 4 bed measured from the OUTSIDE.. so when you divide it up - your rhombus looking thing is going to be too small..
If you're thinking 'holy crap this shit is complex' - no.. it's DEAD SIMPLE.. I'm just showing how a little extra knowledge from a guy who MADE THAT MISTAKE can save you a lot of cursing.
A couple of extra bucks gets you the 10ft long board, and you'll have a little offcut (under a foot), you'll learn an easy trick to making sure all the sides work, and you'll be happier in general.. If you're scrounging wood - look for that extra 2 feet as well. You'll be doubly happy coz you also screwed it to 'the man'.
The Dividers
Ok, you also have some lattice there. it's just thin wood strips - again I got it on a 'get this crap outta here' special in a bundle of 10 strips - I only need 6, so I got to pick the 'best' ones. If you have a table saw you can cut this down from a 2x4 yourself, pick up that cheap ass 2.50 bit of stud lumber and have at it. You might need 2 (I did) if you run into knots or mess up a cut. I got mine for 6.00 - so I paid 1 buck extra, saved me some work and headaches - the special was worth it for me.
The Bottom
Some say this is optional - I say this is needed. You've gone to the trouble of making this thing, so lets finish strong and do it right. I put a 'bottom' in my beds of landscaping fabric. This will stop a lot of weeds and grass growing up from the bottom. 2 of the 'dug down' beds close to the house don't have it, and I STILL weed them and yank grass strands growing out of them a year later. So go the extra mile and do it. You'll thank yourself, or curse yourself for ignoring this.
Also, this is one of those times where paying that little extra can help you out.
This is what I use. It's a sturdy fabric material that lasts - it's on the side of my compost frame and still holds despite how thin it looks. I've used cheaper plastic products and been very dissapointed. This stuff cost me 10 bucks a roll. There's PLENTY, and if you use it like me - it won't be a wasted investment. You'll be seeing me lay this down on a few projects coming up later in the week (if I get time and don't have to race off to the farm).
The Tools
Again, this is what I'm using at this point. This isn't a 'need to have list' - as I also do a bit of carpentry, I have a couple of things that I'll use coz I can.
A saw and a screwdriver. I've got power tools, so I'll use em. I could just as easily (and have in the past) used a regular old screwdriver, a hand drill, and a saw.
It takes a little time, and you sweat a little, but the results are the same.
It's like getting off the bus after a trip from Brisbane to Sydney:
'Smoke em if you got em'.
A measuring tape and a straight edge. Again - something to measure with, something to draw a straight line. Nothing fancy - I use a framers square because I have one and it's easy.
If you don't have one, I'd recommend buying one just because they're so damn useful for a lot of things. You can get them in plastic, mines cast in 'injure your goddamn toe if you drop it' steel. On the upside, it won't break.
Also a stapler and a hammer.... HANG ON THAT'S NOT A HAMMER! No.. it's not. It's living proof that my father-in-law secretly wishes I'd kill myself.
Knowing the story of the accident I had with one of these in my twenties (not going to go into details - but I refer to it as 'the stigmata incident' - you can pretty much guess) he buys me a spanking new one the next Xmas.
Seriously though- he's a great guy who's had ample opportunity to do me in - in much more humorous ways if he wanted :P Seeing how I also had staples for this, I though I'd use it for that too.
LETS BUILD!
 |
| Measure twice - cut once. |
Ok - lets Captain Obvious it for a moment, and we'll get onto that 'simple trick' that's gonna make this easy. SO.. a 4ft x 4ft box, so we measure 4ft - duh...
As we said before, that's gonna leave you with 4 4ft bits of wood that wont have a 4ft interior, and if you put them together, with 2 as sides and 2 as ends, you're also gonna have about a 3 inch difference between width and length. Why? well a 2x6 is 1 1/2 inches wide - you put that on the ENDS of 4ft, and you have just added 3 inches in one dimension..
I just saved you 2 hours of frustration - you're welcome.
 |
| LITERALLY Measure twice! |
Now, if you take your 4ft line and ADD the width of a board (1 1/2 inches round abouts - or better still, lay that other board across it and get an actual thickness...) we can do a little trick that will make sure it's all square and a nice 4 ft inside.
Ok this is the cut line.. We're going to cut this first board then use it as a ledger to make all the others... make sure you use THIS board though - why? because we all have a tendency to cut on one side of a line or the other - if we do it from 'the last board we cut' all mistakes will multiply - this way we can only 'screw it up'.
 |
| All the boards are cut |
So with all the boards cut equal, we put it together.. You might be thinking 'hang on.. you said earlier about all them being the same size....'. Yep I did.. but we're gonna put them together so they're all nice and square.
 |
| Lets put em together |
Ok this gets a little weird to explain, but in actually doing is very straight forward. This pic is your 'guide' every corner should look like this. Every board should have a 'toe in' that is to say it will have one corner at the end with a board attached to its side, and the other end will attach to the NEXT boards side. so there are no 'two sides and two ends'.
Use 3 inch construction screws or 3 inch deck screws - couple bucks for more than you'll need for this project at WalMart or any department store. I found Lowes to be rather pricey in this dept.
 |
| A picture is worth a thousand words |
Zoom in on that and what I'm rambling about becomes apparent instantly. It will be pretty close to square, and it's interior will measure 4ft on the money. No fancy math, no fancy thinking - add the width of one board and be careful how you screw (a lesson you can apply to all aspects of your life).
If it doesn't line up exact, it's not perfectly square, the corners aren't perfect - don't sweat it.
Mike Holmes isn't going to appear behind you and stare you down with that 'Son, I am dissapoint' look. It's meant to hold in dirt and keep out weeds, nothing more and nothing less.
Lets look at mine - it's warped out to high heaven, and you know why? Because cheap wood is cheap for a reason. This wood has a twist so bad that if I spun that plank around the center I could have launched a Sopwith Camel. Nothing short of 4 hours with a jointing plane and making all the sides 1/2 inch thinner would have fixed this. But it's ok, and to tell the truth I hardly noticed it once the thing was in place and filled.
If this were a bit of furniture or a cabinet I was working on - I'd have my wife pounding on the toilet door saying 'you've been in there 4 hours and all I hear is sobbing...' but it's not.. it's a garden bed - don't sweat it.

Onto the bottom. You're going to have to make 2 passes on this - it's no biggy. Roll out your landscape fabric, I leave an inch or so overlap on the sides so when I put it down it 'wraps up' making sure no grass can creep in at the join. You line it up the top and take your nail gun, loaded with staples and......
... you realize the thing is too powerful and either blasts holes in the fabric or doesn't propel the staple no matter what you set the pressure to. So you go and get your stapler and use that - because it's the right tool for the job, and you're a bonehead.
Pop in a couple at the top, pull tight, pop in a couple at the bottom, then go around every 4 inches - pull tight, shoot a staple. Top , Bottom, and Side. Repeat for the other side and the you'll find the 'loose flap' in the center pulls tight - and even if it doesn't, grass that grows through that is probably keeping good company with Kennedy's Magic Bullet during it's downtime.
Setting and Filling
Up till now we've used a handful of dollars to build a garden bed - just like a lot of posts/blogs/youtubes/books say, it's pretty cheap! But they don't tend to go on much about what can be the rather expensive part.. filling and using it. How expensive can it be? Well if you decide to go with that super-great uber nutrient Miracle Wow Potting mix that's only 10 bucks for a 3ft bag... you're in for a bit of sticker shock.
See 4 x 4 = 16 square feet, and at 6 inches high, that's 8 cubic feet (coz 6 inches = half a foot), and that bag o wonder you saw for 10 bucks probably isn't measured in cubic feet, they mean a square foot measurement of some arbitrary depth.. might be 3 inches, might be a 1/4 inch sometimes they don't even say. Sometimes they have small print that tells you it's actually 0.25 of a cubic foot or just to totally screw with you, they also have it in liters (metric unit of volume). So you buy bag after bag after bag and soon you paid 200 bucks for a garden bed... probably 4 months of your veg budget.
Some books and forums will tell you the only true way will be to use Dr This Man's amazing formula of 1/3 this, 1/3 that, and 1/3 the other - and all will be good - and if you've cottoned on to who I'm talking about, I'll follow this up with 'yes, it is good - though it can also be quite pricey'.
What I do is shop around. Often during the off season when I can and get stuff on special. What brand I get usually depends on 'what's cheapest'.
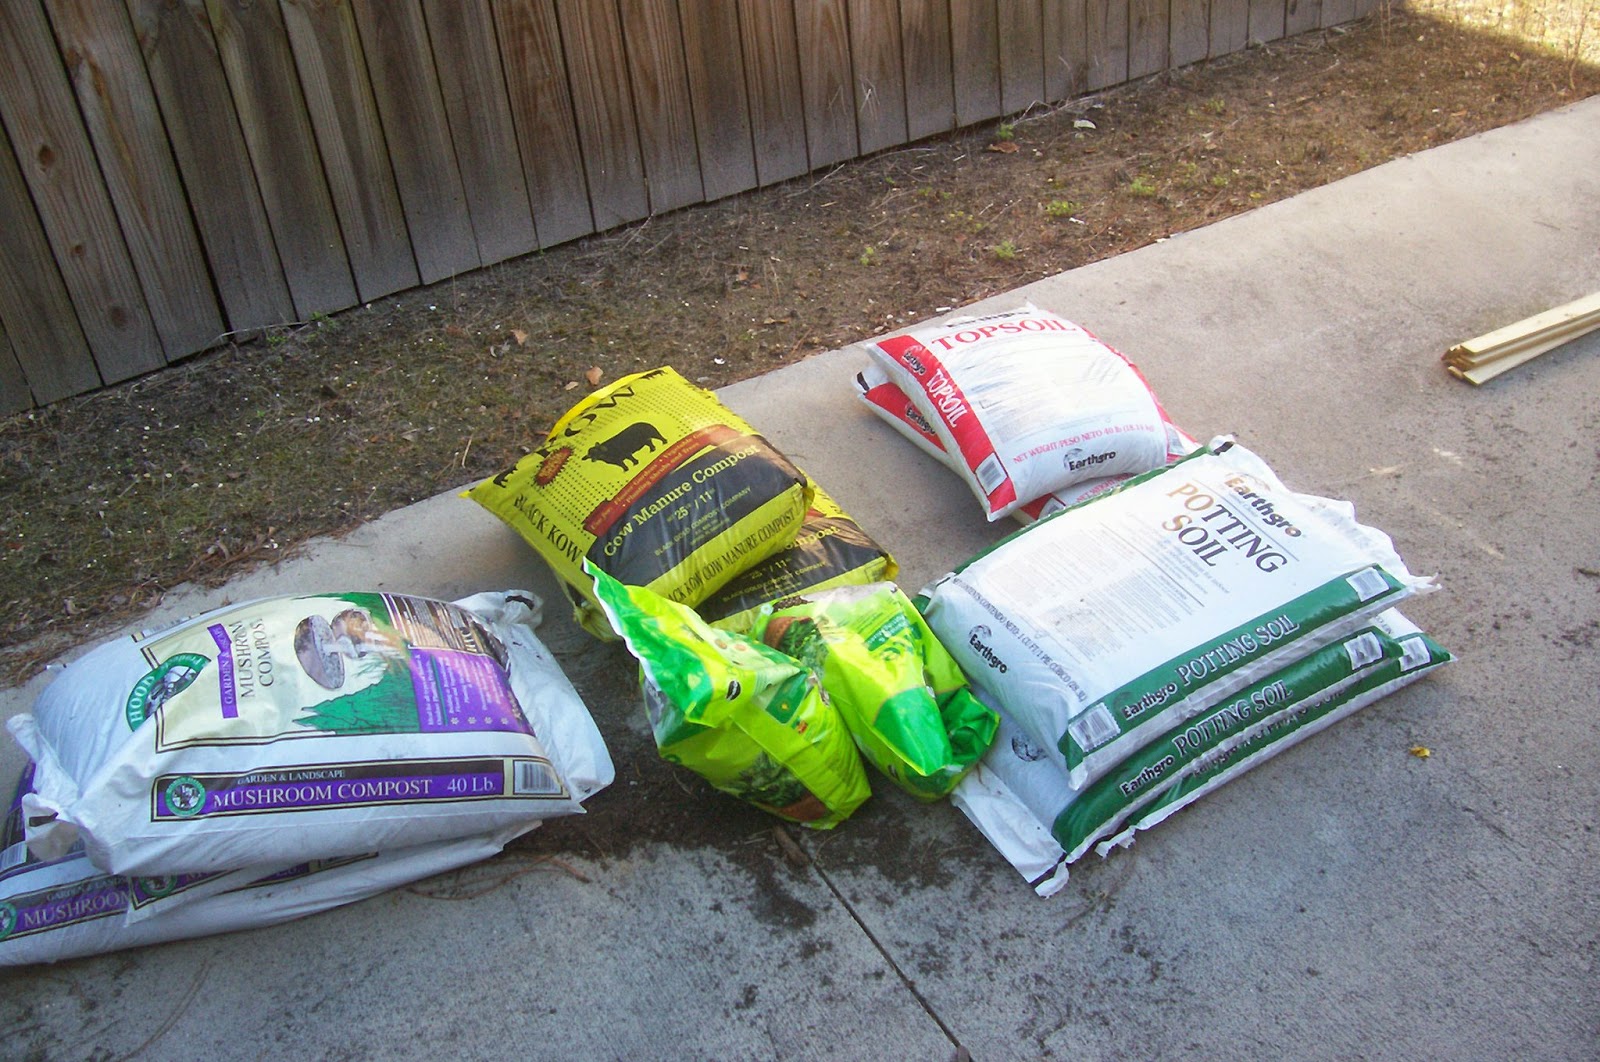
Here's my under 50 dollar list for this garden bed, and I didn't use it all - It was part of my '100 dollar buy for Spring' covered last post.
2 80lb bags of cheap topsoil (1.10 a bag)
3 bags Mushroom compost (around 2.50 a bag)
3 bags of 'Black Kow' cow compost - around the same.. it's important to note that when buying cow products to get the one that says COMPOST on it - I bought 'manure and humus' or something last year and it was 'glumpy' - and practically solidified the soil I used it in. Black Kow is a good brand that's pretty fluffy and nice.
2 Bags of Miracle Gro Perlite - yeah yeah I go on about Miracle Gro all the time and how I don't use it - but when they have a sale for 2 bucks a bag, I'm there. Usually it's more pricey and I go for a cheaper brand. BTW I only used one for the bed, the other is for other projects.
4 bags of 'whatever is cheapest' potting soil. this one was 1.50 bucks a bag, and I only used 2.
Doing the math, it was around 30 bucks to fill this bed.
 |
| Look at that paragon of a shadow! |
So, prep the area you're going to put the bed into - I sprayed with a weed killer I use at the farm, you could use roundup, or you could just take the grass up with a hoe - whatever. but you want to minimize the chance of weeds going up into your bed. We go the extra distance and weeds can only vector in from the top - can't grow into or under. We do 1/3 the weeding that way - an ounce of prevention saves a huge pain in the arse.
Now mixing.. there's a popular method using a tarp where you pour it all in and lift corners, fold the left side in, fold it out, shake it all about.. but when you're dealing with 8 cubic feet of material you have to batch it out - and that means measuring stuff and doing a lot of work - and I'd rather do the work where it matters.. so here is my very simple way of filling and mixing.
We put in the topsoil (above) - it's really just another 'protection layer' - its cheap and rather dense - and when we smooth it out with the backside of the soil rake it's only about 1/4 inch thick across the board.. it will compact down and stop stuff breaking through.
Next we add the mushroom compost and smooth that out - it's pretty light and this will be the first layer of 'proper soil' in our bed.
I had other pics, but my camera is playing up a little. We add the black kow, all the bags and mix a little as we smooth it. 2 blocks of coconut coir (after water and mix up of course) and a bag of perlite will 'break it up' a bit - lighten up the soil and add both drainage and some retention at the same time. The coir will of course break down over time and add to the soil.
With each layer added we give a gentle mix and smoothdown with back of the soil rake.
The final layer is 2 bags of potting mix. I just smooth this out over the top - around abouts the top level of the frame - don't overfill! we have another step to go, and we will be adding by hand after that to fill this bed to capacity.
For now just level it across roughly. 1/4 inch under is fine in spots - we'll take care of that in a moment.
What About That Lattice Thingy?
HOLD ON you pushy bastards! I'm getting to that! Lay that tape measure down the a side and measure out 1 foot intervals - mark them and do the same for the other side - MAKE SURE YOU MEASURE FROM THE SAME EDGE! It doesn't matter if you're a bit out - but try and be a bit out equally.
Lay down our lattice and pop a nail at the top, NOT THE BOTTOM. We will need to adjust it a little for the next step.
Do the same on the other side. Weave them under and over in a nice basket pattern. This will not only look a little neater, but has a function as well - it will hold your lattice in place nice and snug. If some of it weathers or snaps, or a nail pops out, your nice grid for planting will remain intact for quite some time - and you can replace that slat at your leisure.
Next line up the other ends with our marks and pop nails in all the ends - snugging the whole thing down.
 |
| And Voila. |
Cut off the overhang with whatever saw you want - handsaw, reciprocating saw, circular saw (what I use), anything that cuts.. cake knife if you want the bragging rights... but in the end it's done. All over...
HUH? WHAT ABOUT THE SOIL? What? All the soil is in layers and I didn't mix it? No. I didn't.. but here's the deal - I'm going to turn each square as I plant it out with a garden fork - the spikes on it are only 3 inches long so I'm not going to hit the fabric unless I dig like a dervish headed for China. Each square will be turned and planted every time I use it - so the soil 'layers' will be mixed from the get go. Since we put it down in fairly even smooth layers, the soil consistency will be about the same for each square - and we didn't even need all those extra steps involved with a tarp.
At this point I'll also add a few handfuls of worm compost and if needed a handful or two of potting mix to bring each square up to level.
A FINAL NOTE: Now this is simply 'A way' - not, as others may say 'THE way' - it has worked for me and I've used it for a couple of years now with no problems. In the end, soil is a medium and an environment unto itself - this is just the starting block of building good garden soil. As it's used it will be amended, changed, and improved over time. If you have an idea of your own, TRY IT. Experiment and have fun. Just remember that fun can be on a budget - you don't have to spend a hundred dollars to make a SINGLE garden bed - you can do it in under 50 and have results just as good (if not better). There is only so much in gardening that you can throw money at, in the end knowledge and imagination trumps dollars.
Cheers, and happy planting!